
Working the Scene
Down the Rabbit Hole Part 2 - Cameracraft

In my last newsletter, I described how I returned to a very special valley to test my recently purchased hammock and tarp. The aim is to be able to spend more time deep in the Central Highlands of Victoria – there are few places to pitch a tent, but plenty of trees to hang a hammock – searching for those conditions that will best represent what I feel to be the essence of a place.

While the last newsletter was about fieldcraft and place, this newsletter focuses on cameracraft and how I work a scene to capture options for processing in edit.
I.
Overnight I decided not to head further down the valley as I had not made enough distance on the first day. Instead, I left the hammock and went exploring with just camera bag and tripod. Freed of the weight of a pack, I could easily climb down to the bottom of the deep valley, searching for possible images.
In this location, the sense of atmosphere is so vivid and tangible. This strong connection with the landscape always inspires me to seek images that will capture a timeless moment.
To get safely into these locations (fieldcraft) and be open to the place’s atmosphere is one thing. A photographer also needs the camera craft to be able to capture something of value.
II.
The first scene I came across was okay; there was only one view point at the bottom of a jumble of boulders with a nice flow of water. This is a good example to show how I capture a single scene and then blend versions.
I took three 3-bracketed exposures as shown below. Dynamic range was not an issue; rather I find it an efficient way to capture multiple shutter speeds with their different effects on the texture of the water. With 3 presses of the shutter button, I had 9 images from 0.25 second to 1.6 seconds (I can’t remember why I changed the aperture).
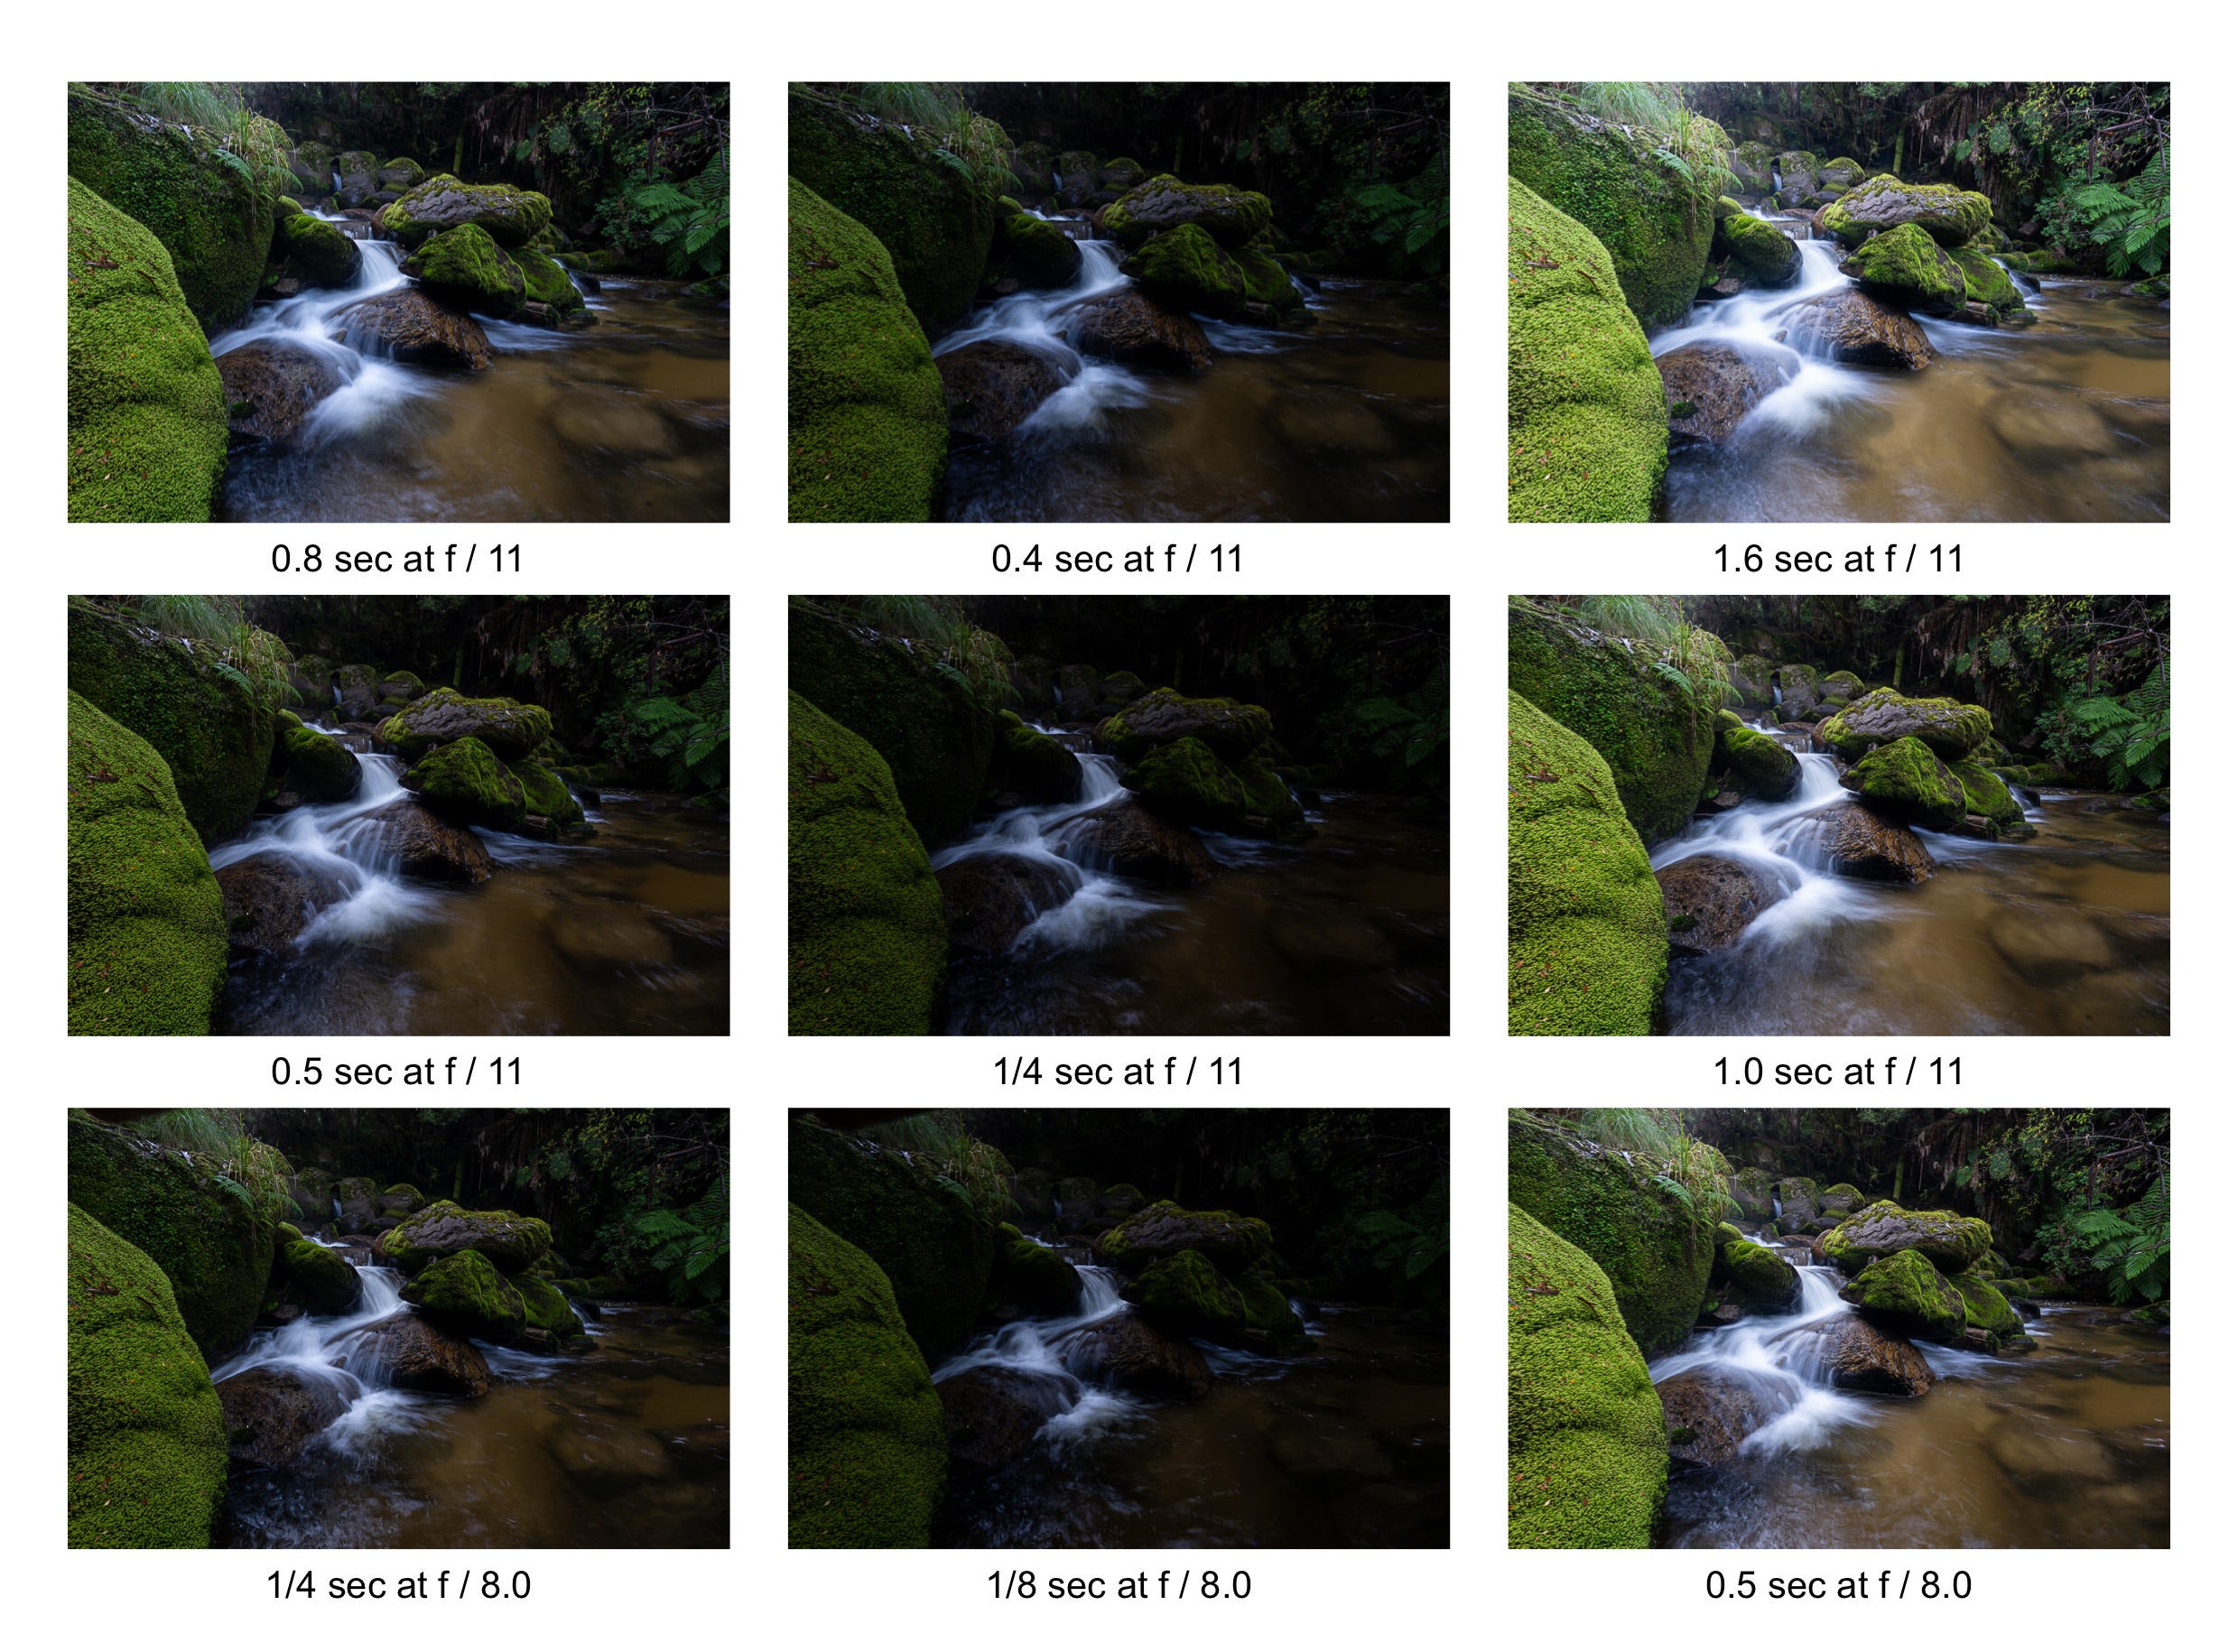
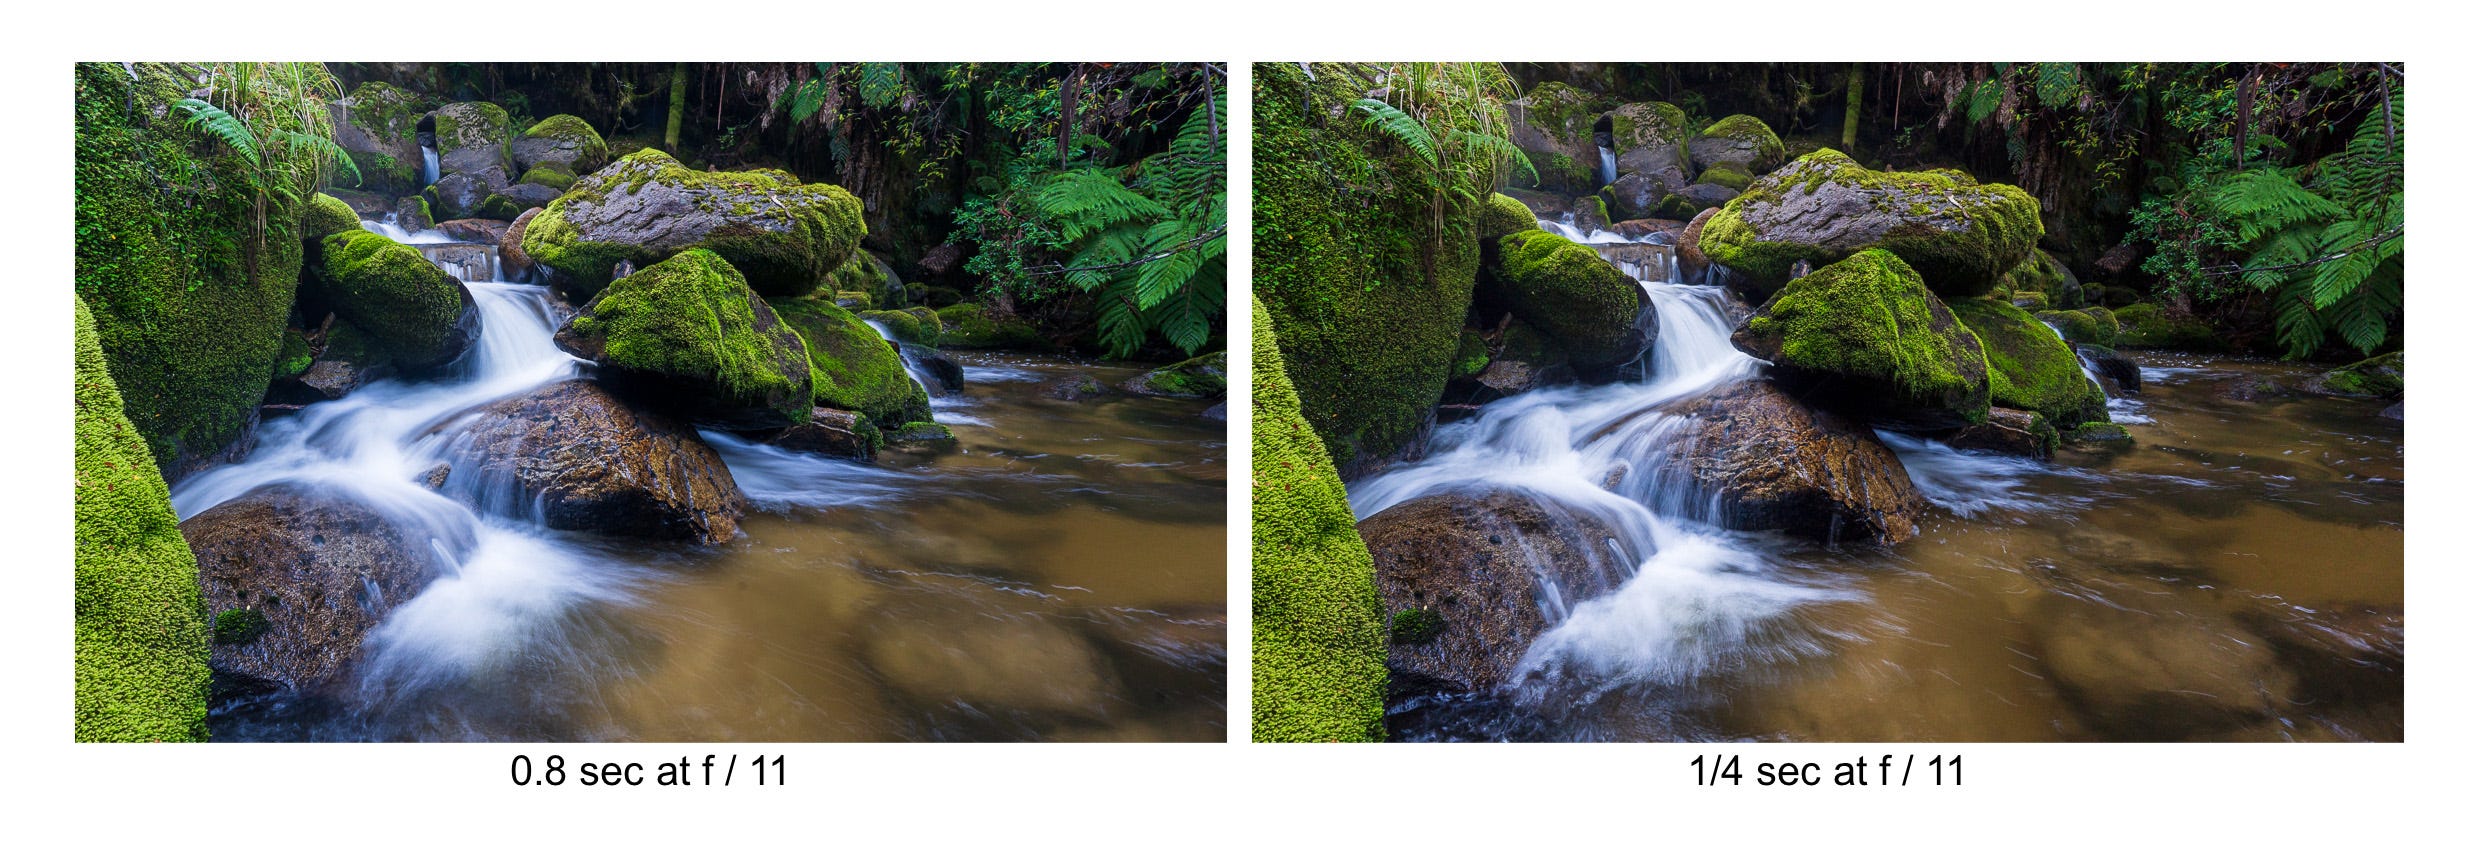
At home, I decided I liked the ¼ second image for the texture of the cascade and the 0.8 second image for the water in the pool at the bottom. As it happened, the longer exposures also had a little lens flare in the top left corner, which I couldn’t see at the time on the back of camera.
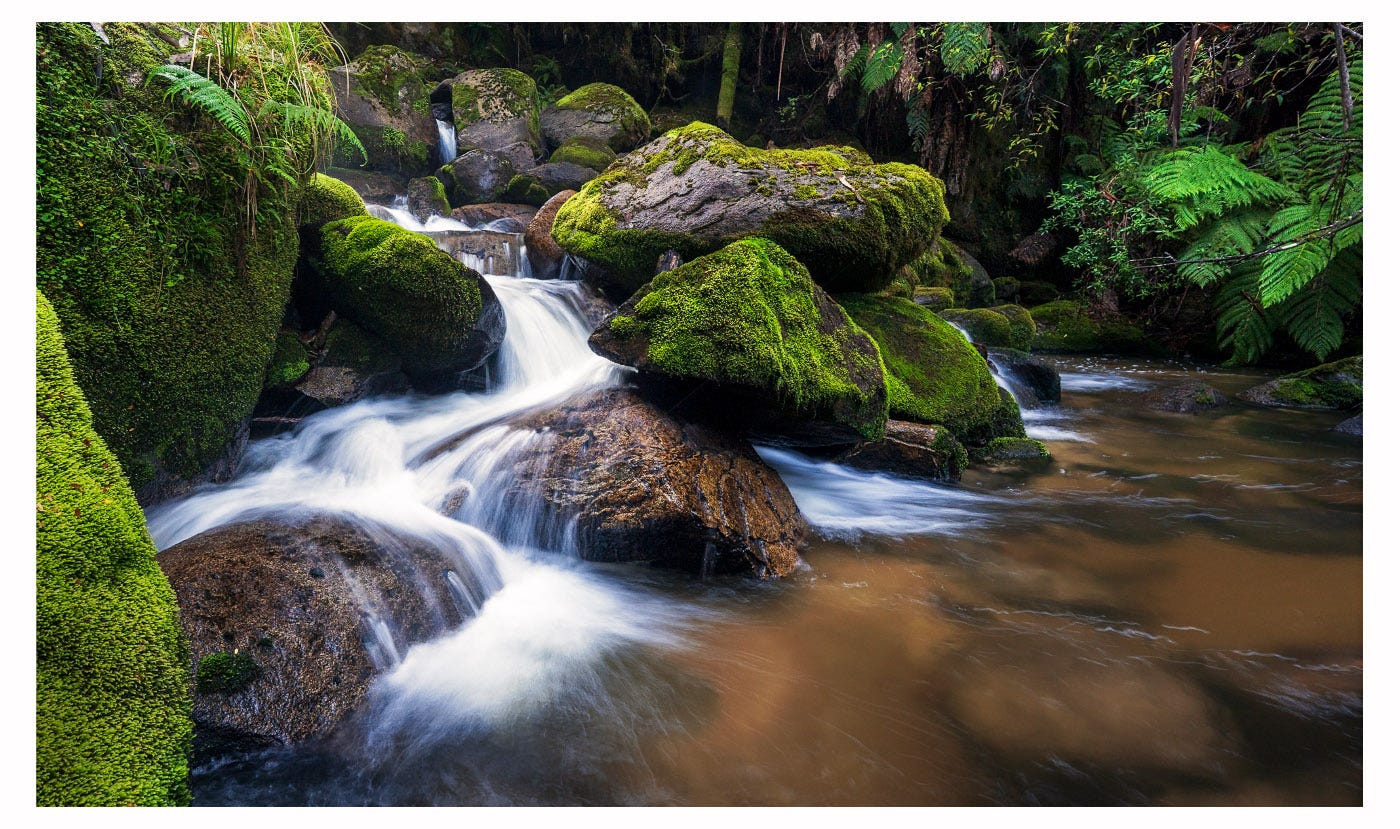
I processed the ¼ second image in Lightroom and then synched settings with the slower image and then adjusted exposure, as can be seen below. I then imported as layers into Photoshop, aligned the layers and hand masked the slower image on top of the quicker image. I also did some minor edits to manage the highlights and shadows, added contrast through a little dodging and burning (for example, the ferns on the back wall), and did some minor colour correction (for example, to the colour of the pool) to complete the image.
III.
I moved on to another location, the scene I found on my very first trip to this valley. The image below shows the places I put my tripod as I worked this scene.
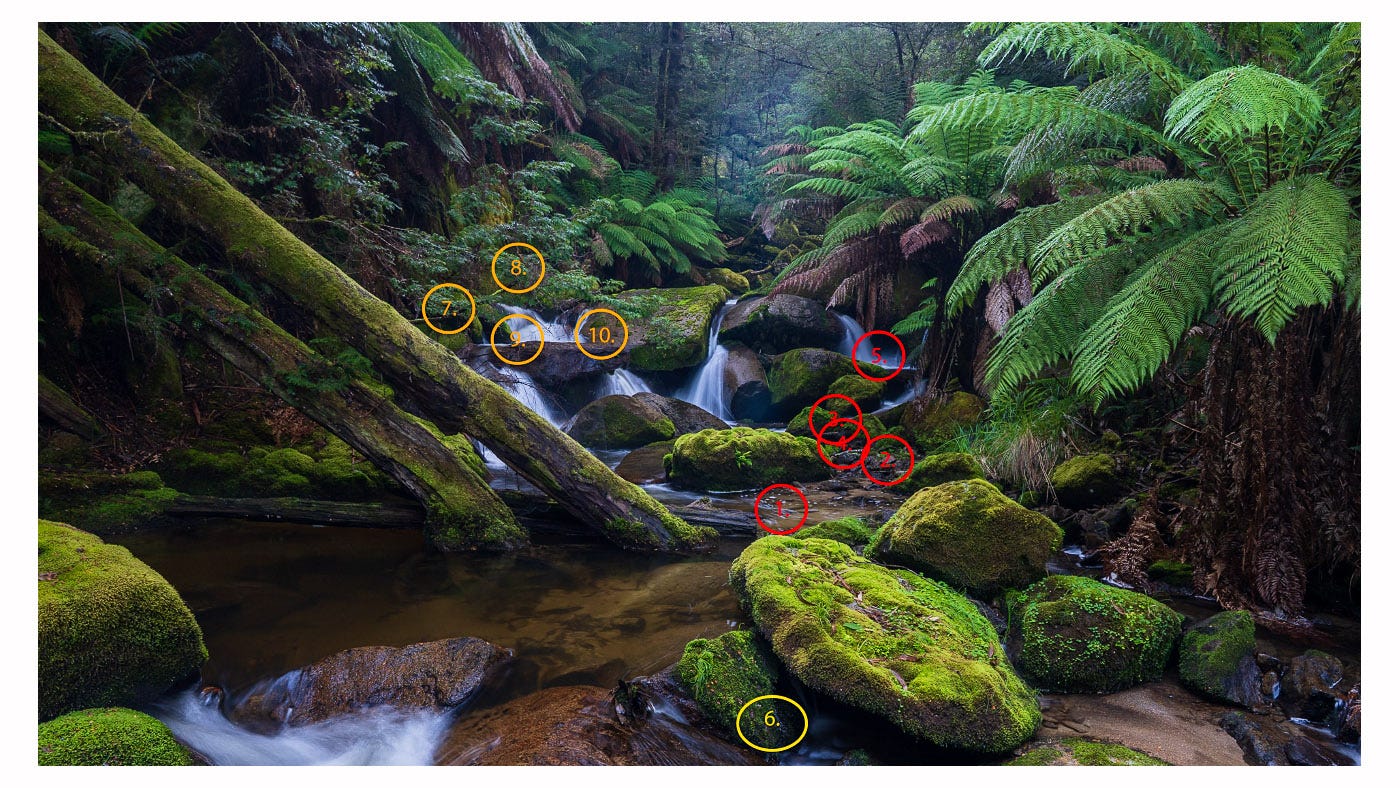
I came in from the left and had to cross on the log, hugging the two logs angled down to not fall in and started where the red numbers are. The contact sheet below shows the images I took here (I have only included one exposure, although each was bracketed +/- 1 stop, and applied a simple Lightroom adjustment in the Basic panel).
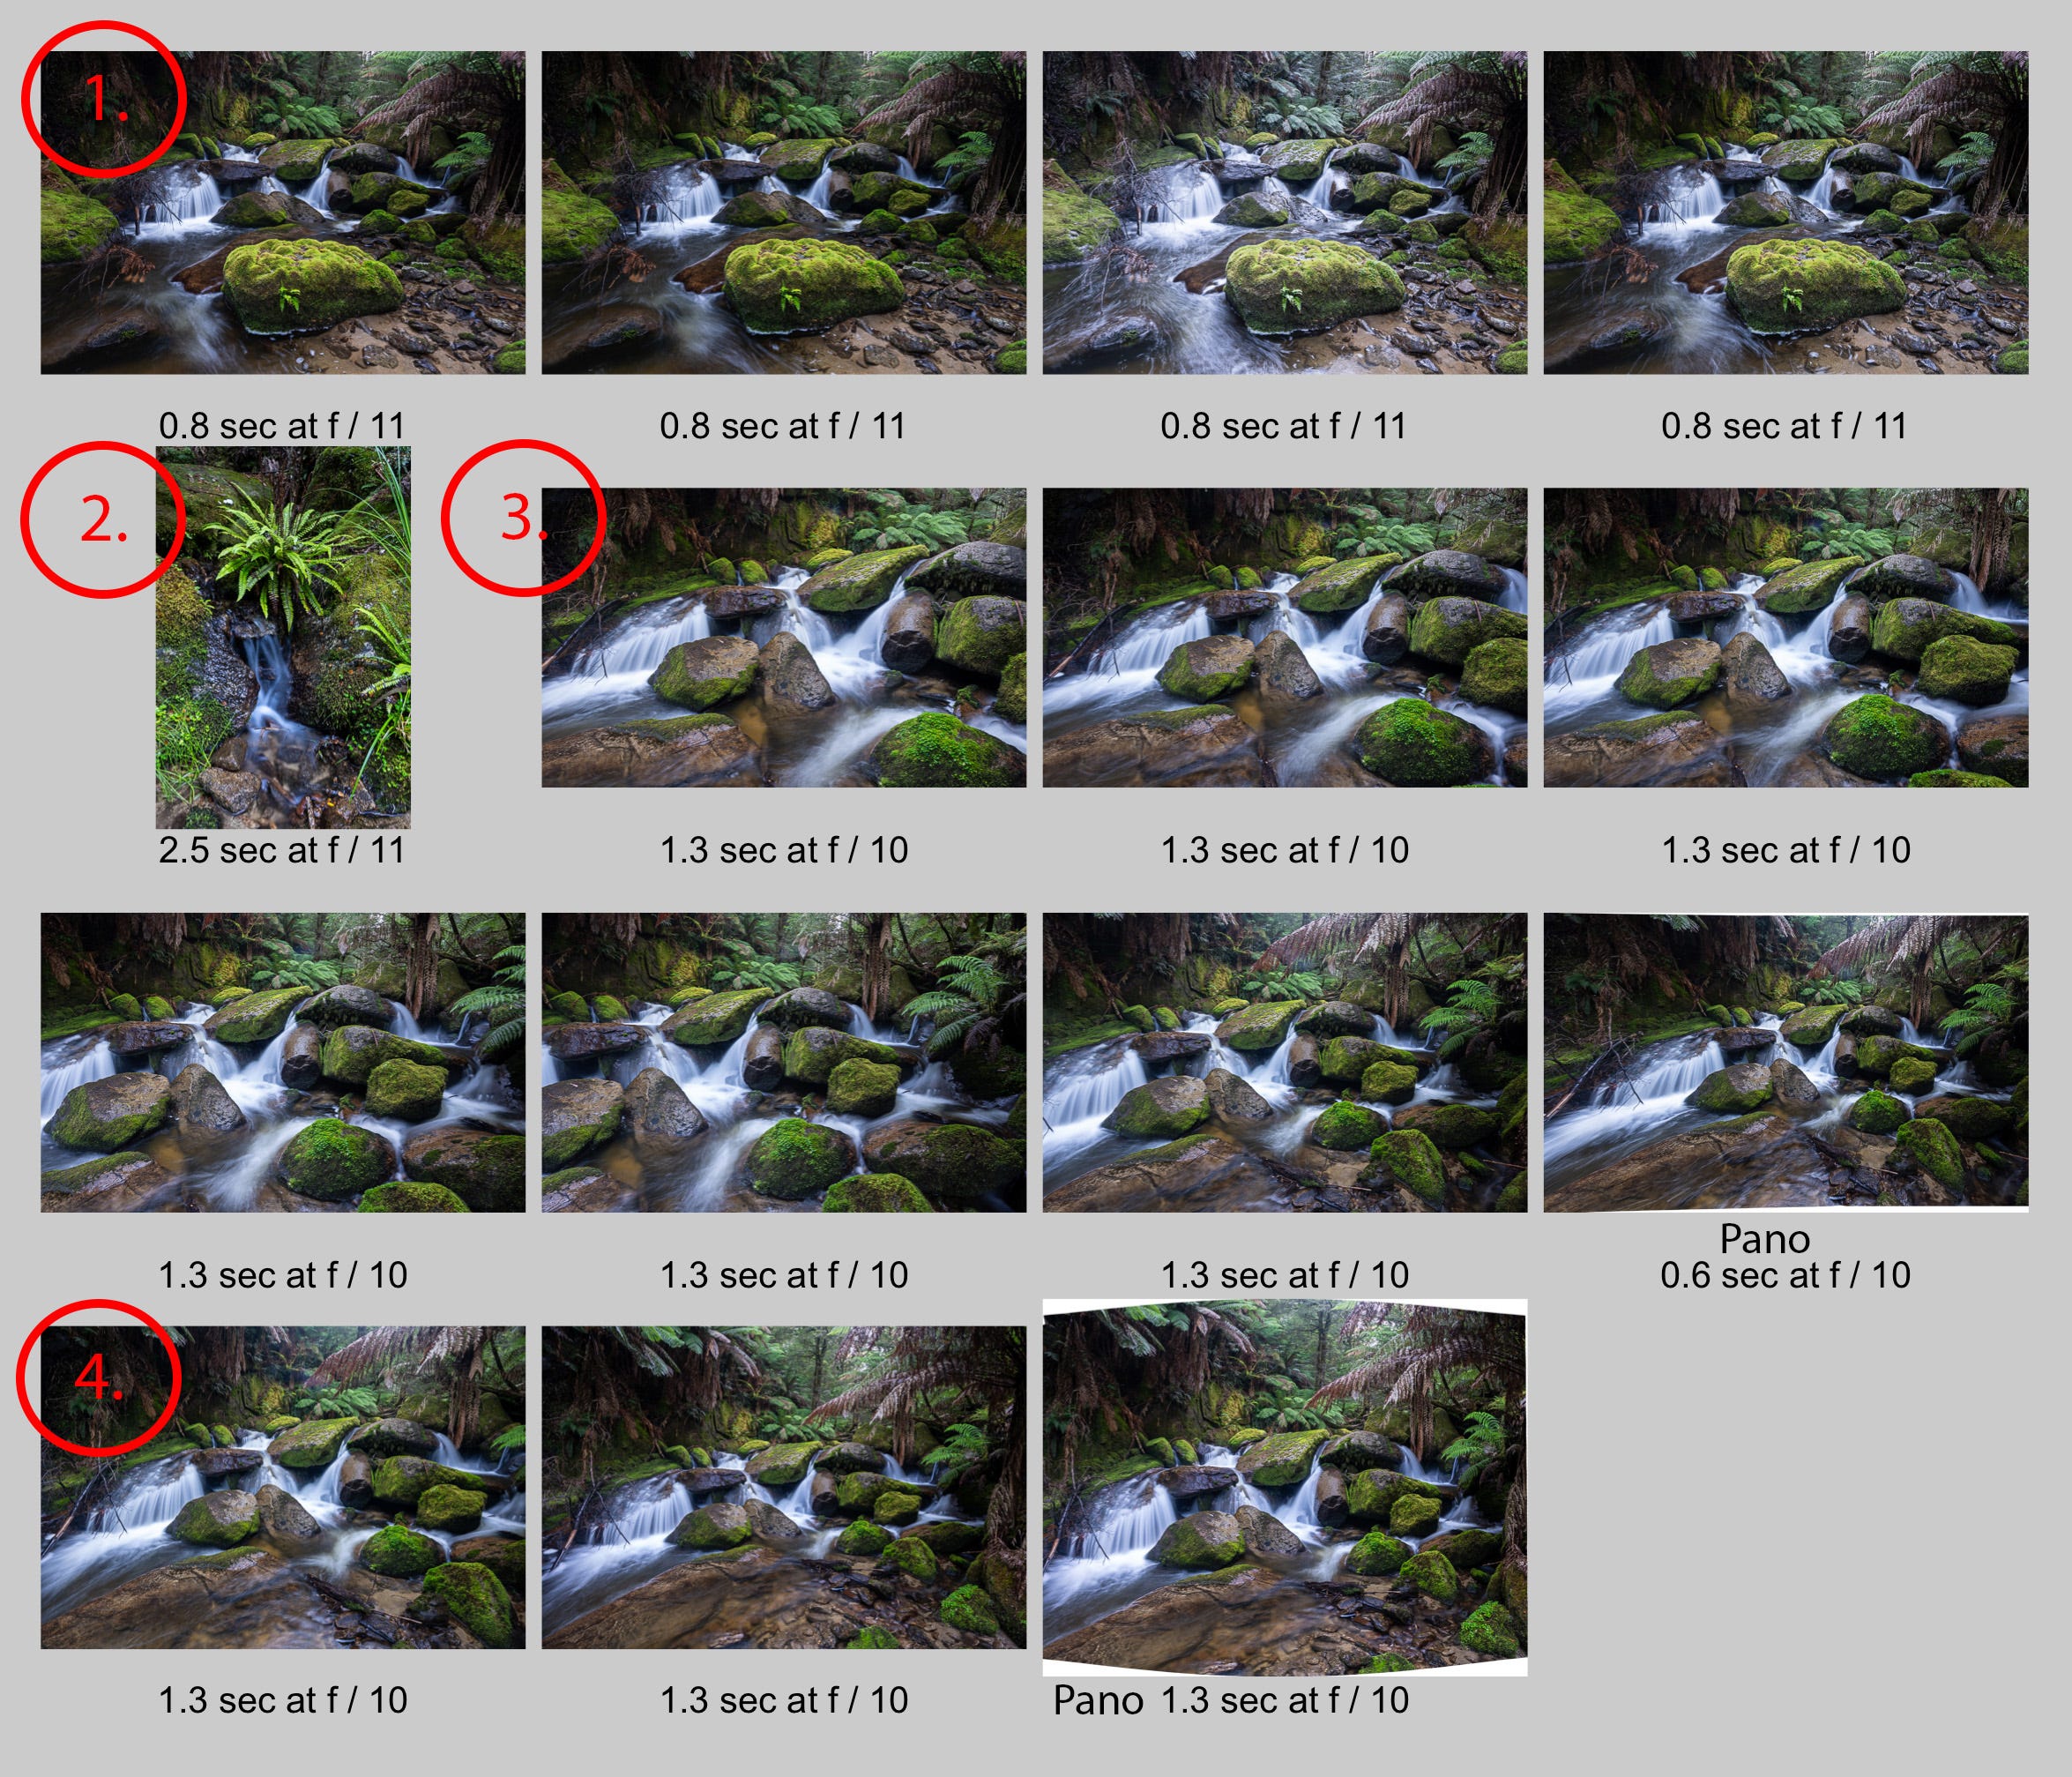
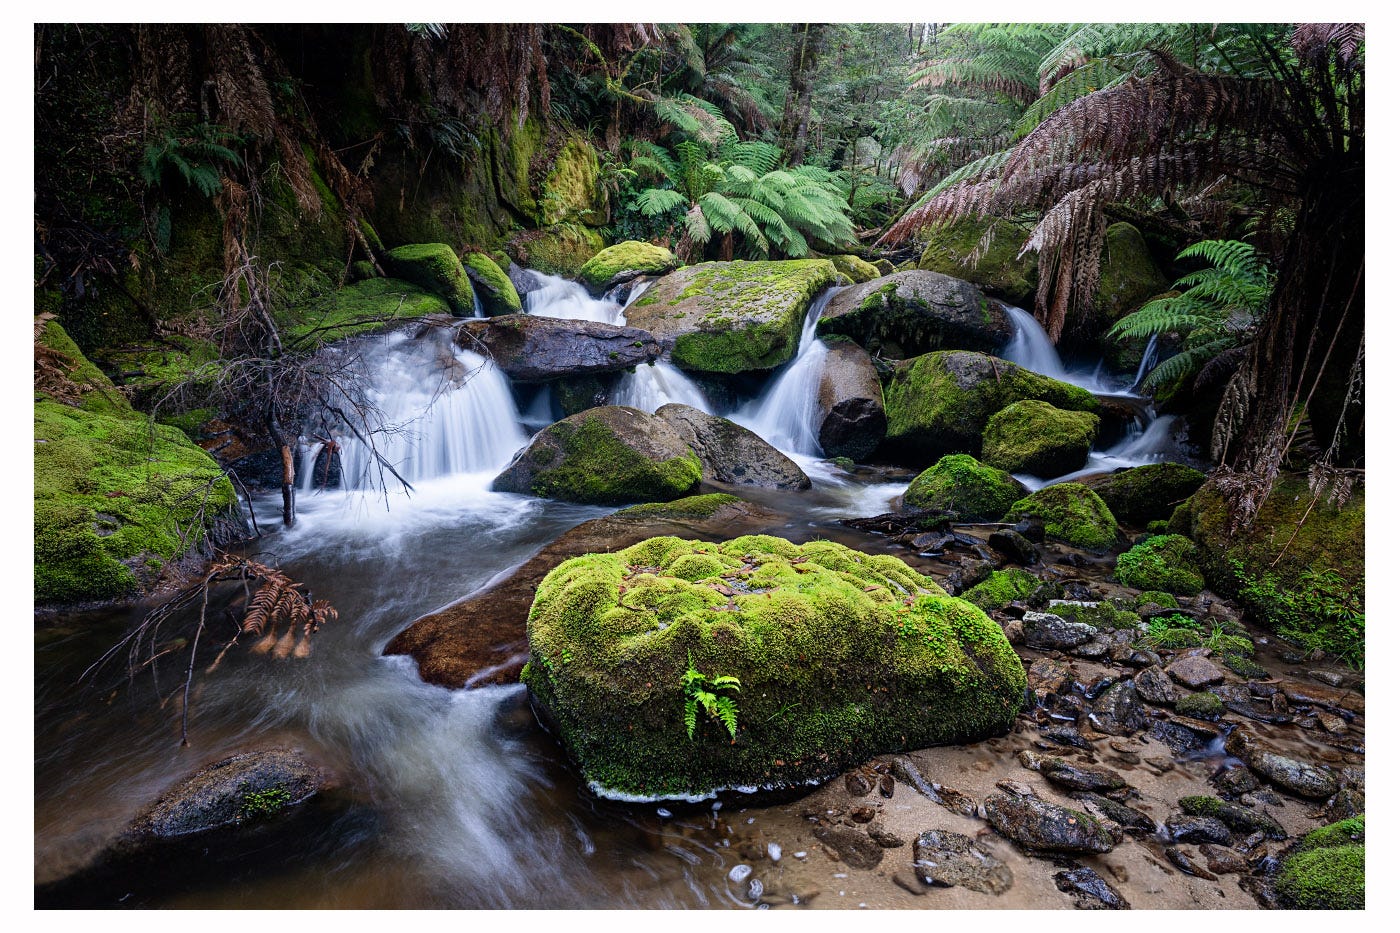
I started at point 1 to capture the big moss-covered boulder. This image below used 3 of the first 4 images on the contact sheet below to both focus stack and bring back some of the glare from the non-polarised image (the first two images used a circular polariser). I was keen in the edit to emphasis the distinct zigzag of lighter elements (bottom right - centre left - top right) which helps draw the eye through the scene.
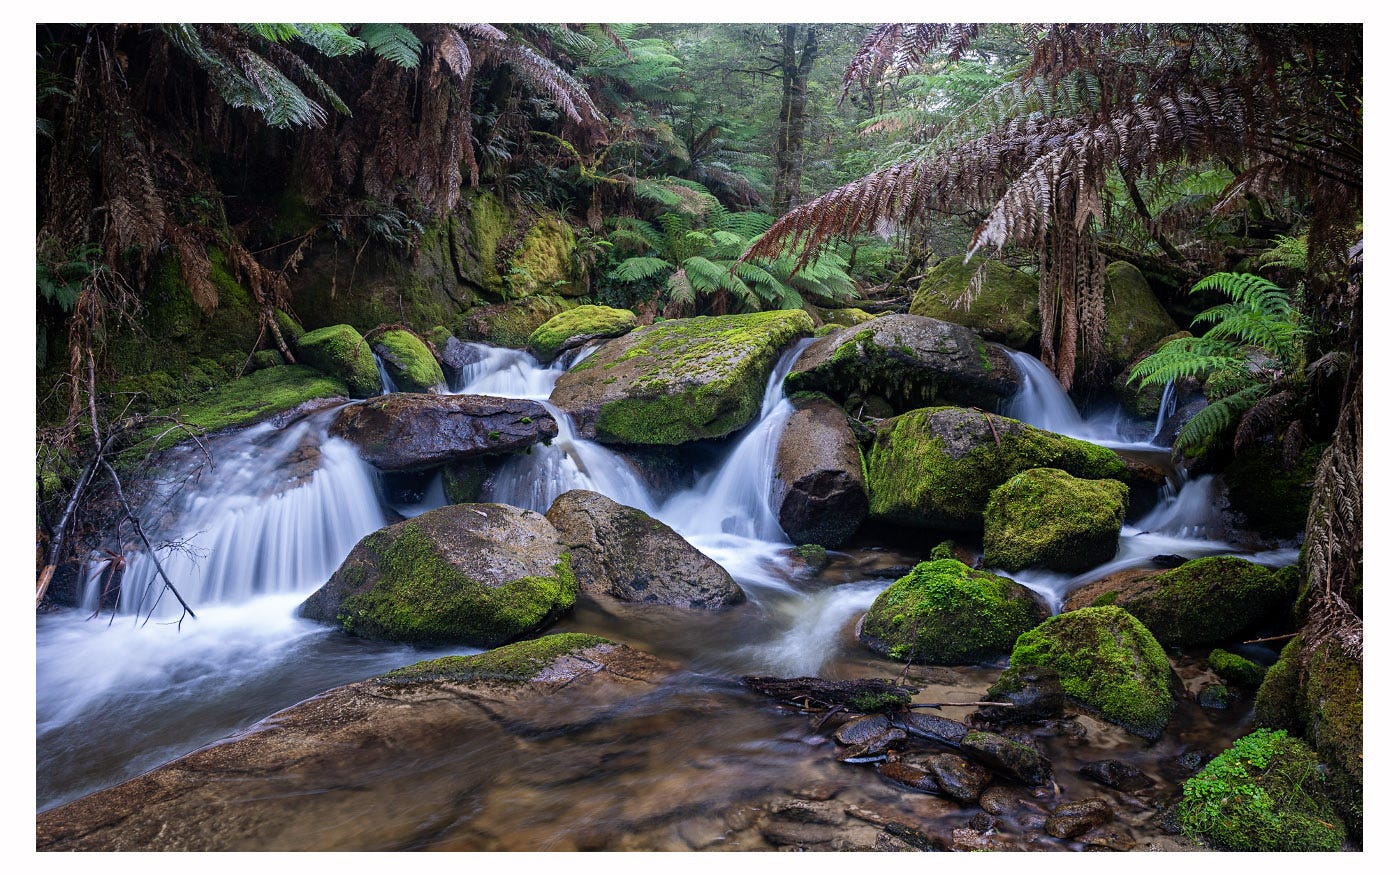
Then I tried a smaller scene (2) which didn’t really worked. At point 3, being much closer to the cascade, I tried a pano which I thought would work but turned out to be a bit distorted and unbalanced. Fortunately, I also moved a little further back (point 4) for another pano, shown below after further editing in Lightroom and Photoshop.
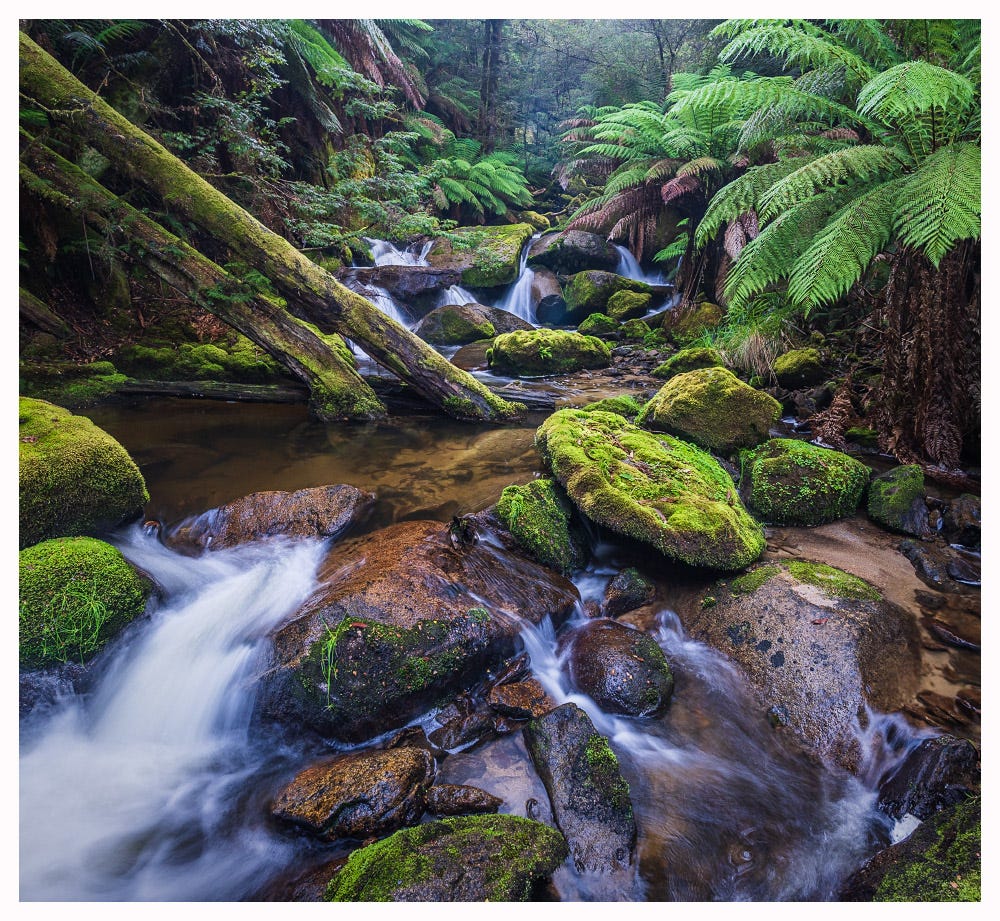
I also climbed up the boulders to point 5, thinking those smaller falls might be nice, but they weren’t. I didn’t take an image but you never know till you go. I then moved back to point 6 where the photo with the numbers was taken. Here’s another image incorporating more foreground.
I then went back across the creek to the orange numbers and tried a couple of other views further up the valley (7 and 8) and then looking across the creek (9 and 10). Nothing great, but the point is to fully explore options. Sometimes it is an unexpected perspective that is the best.
IV.
Soon enough I decided to head back to camp. I climbed up the valley side, in many places requiring some tricky scrambling. There was no way to exactly backtrack my route so I was very pleased that I was able to navigate directly back to the hammock.
I packed up and headed out. I reached the old bridge after about an hour and had a choice. I could cross the bridge and walk out on the management track. It would take half an hour. Or I could head further upstream and exit at another track much closer to the trailhead.
I decided to do the latter and explore further upstream. So started an epic 3 hour slog to cover a couple of kilometres through thick bush and waist deep water.
But that’s another story.
Postscript.
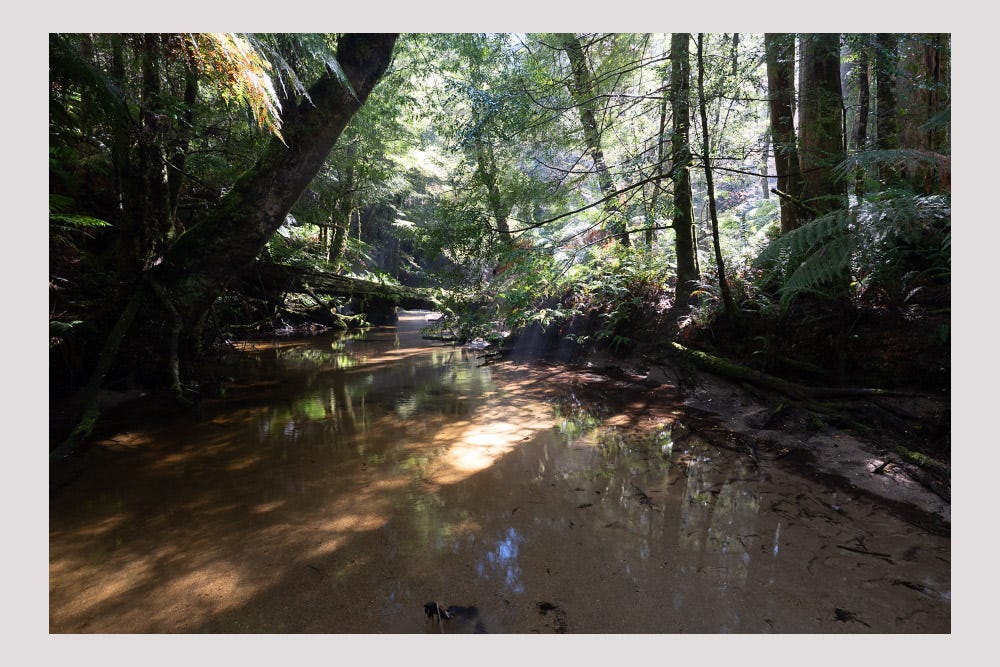
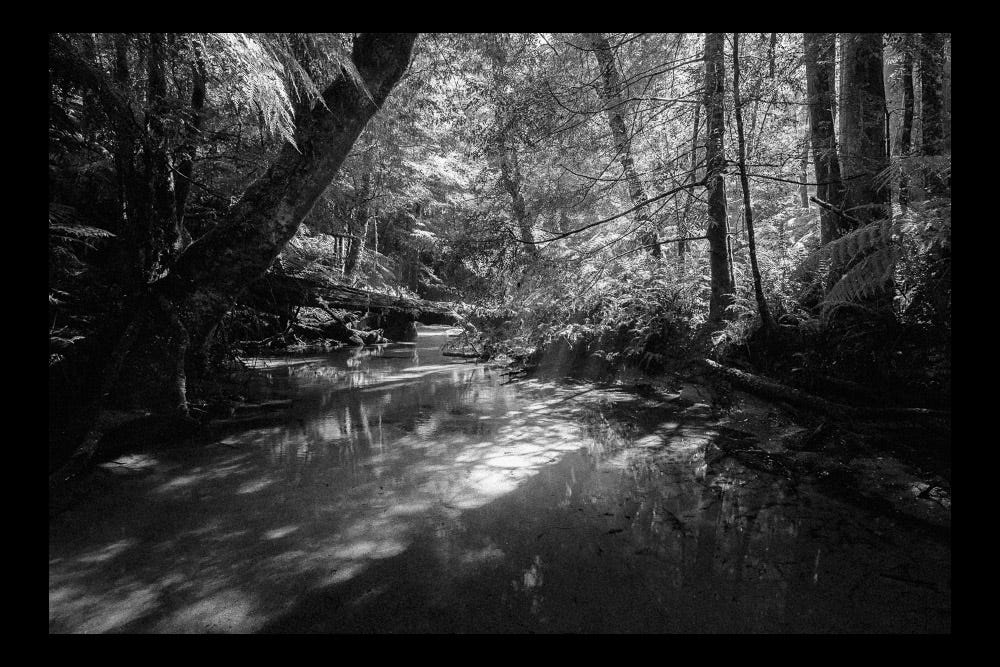
Although the light by now was very bright and contrasty, it is always worth experimenting. Mostly it doesn’t work out but occasionally you get something interesting. The unedited RAW file below, taken as I walked up the river, is a hot mess. But with some heavy editing, I am very happy with the final black and white image – a nice bookend to the black and white images of previous newsletter.
I learned a lot from your approach to camera work. Thanks for that! My process is similar, but I’m not quite as systematic with in-camera bracketing.
Nice work. 👍