
The Dragon’s Head
Experimenting with shutter speed and split toning

Another weekend of beautiful summer days. With bright sunshine, little water in the creeks and straggly looking vegetation, I decide to avoid the mountains and head down to a well-known seascape location on the Mornington Peninsula, the Dragon’s Head.
I knew the tide at dawn should be just right to have water flowing nicely over the rock platform and the forecast suggested there may be some sunrise light (spoiler, there wasn’t). So I headed off for a morning up to my knees in salt water playing with light, composition, and shutter speed.
Today’s newsletter is about two things:
the impact of changing shutter speed, and
the use of split toning in black and white images.
While all the images are taken within 50 metres of each other, the conditions on the coast were overcast and changeable, with a bit of rain and 4 minutes of bright light (which produced a pretty special image). It was the perfect opportunity to experiment.
As a result, this is quite an image heavy newsletter. I would love your feedback on which versions you prefer and why.
Shutter speed
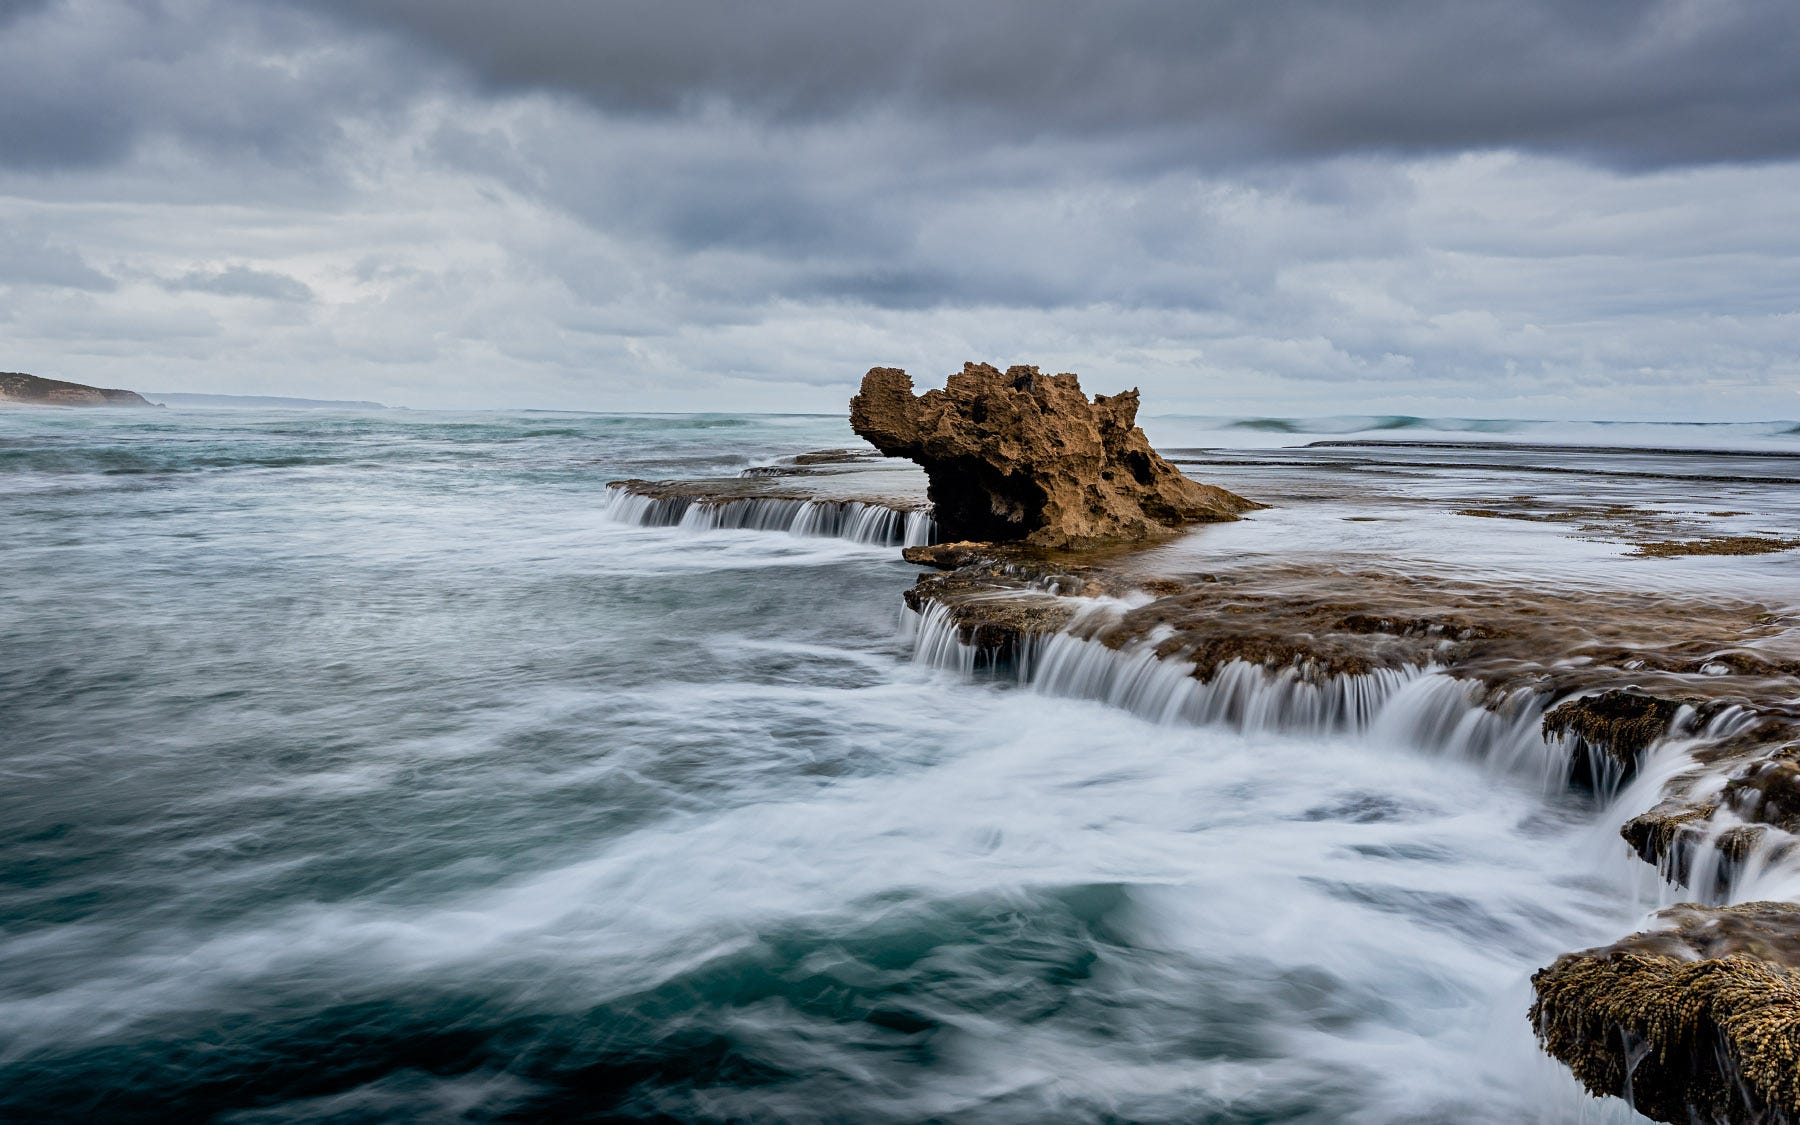
The image above is one of the first compositions I settled on. There was a tiny amount of colour as the sun rose over the horizon to the left but not enough to have an impact. At this point I realised it would be all about flow.
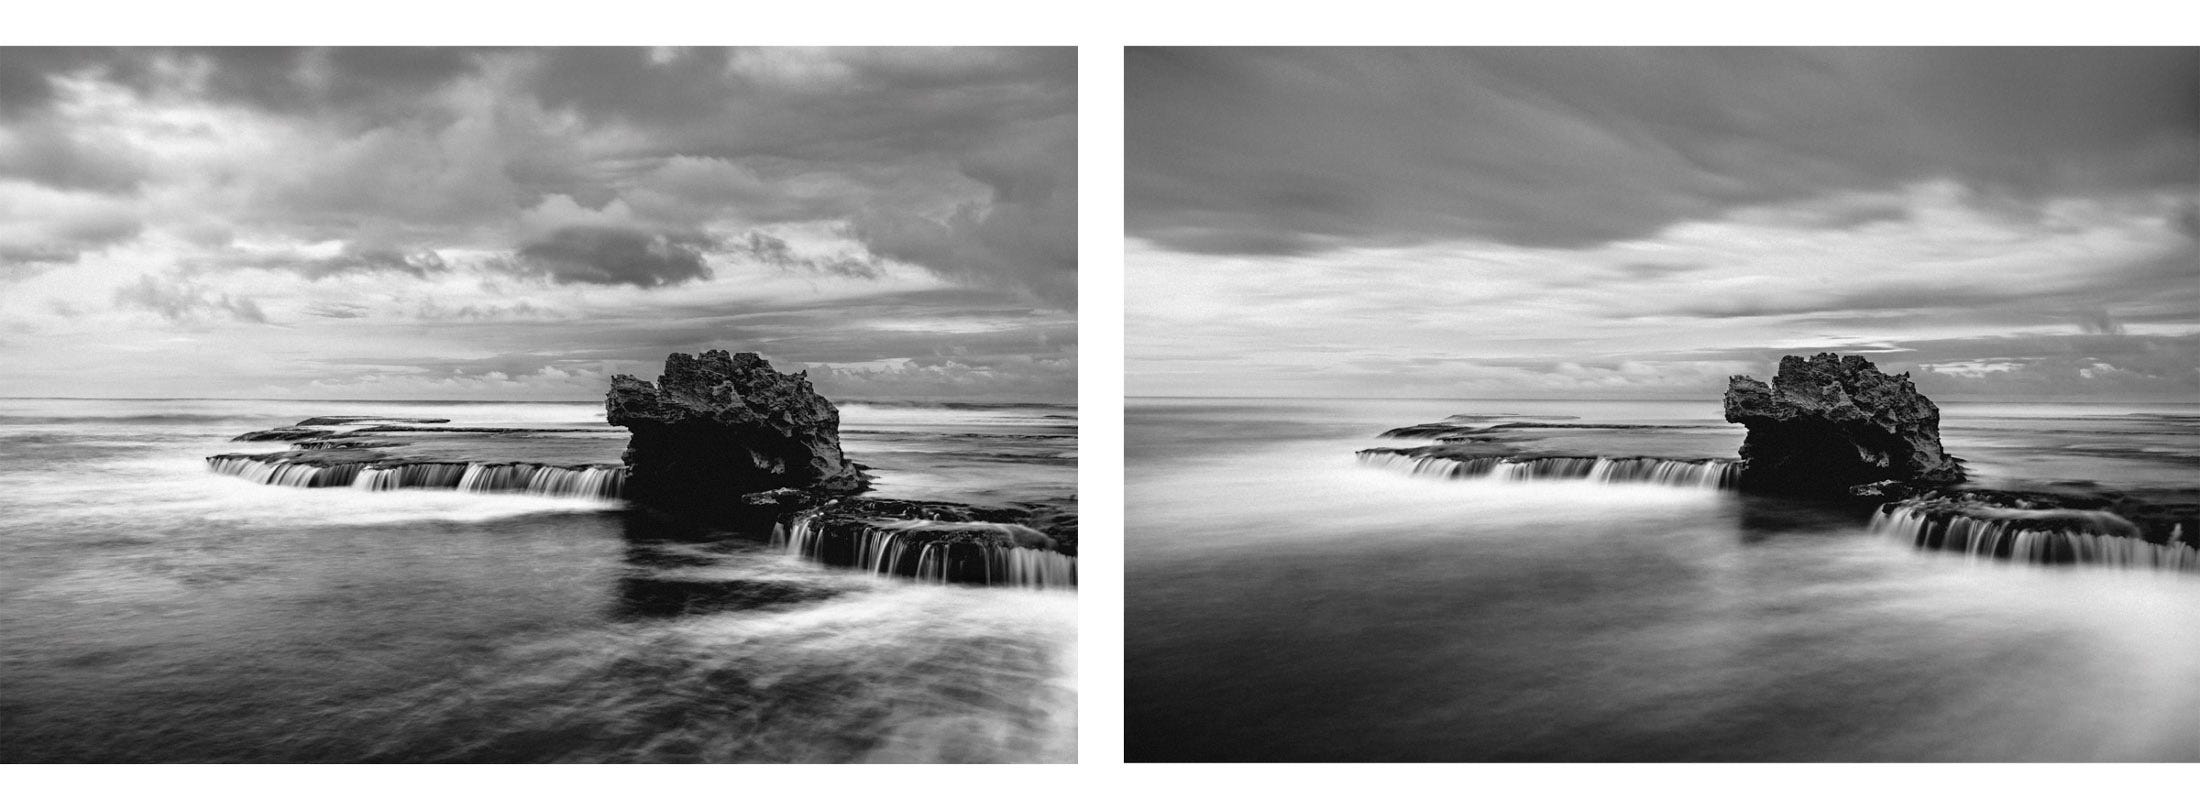
In this series (above and below), you can see the impact as I slow the shutter speed from 1.3 to 2.5 to 15 seconds, all with the same edit. To me, this is a simple choice of which one you prefer.
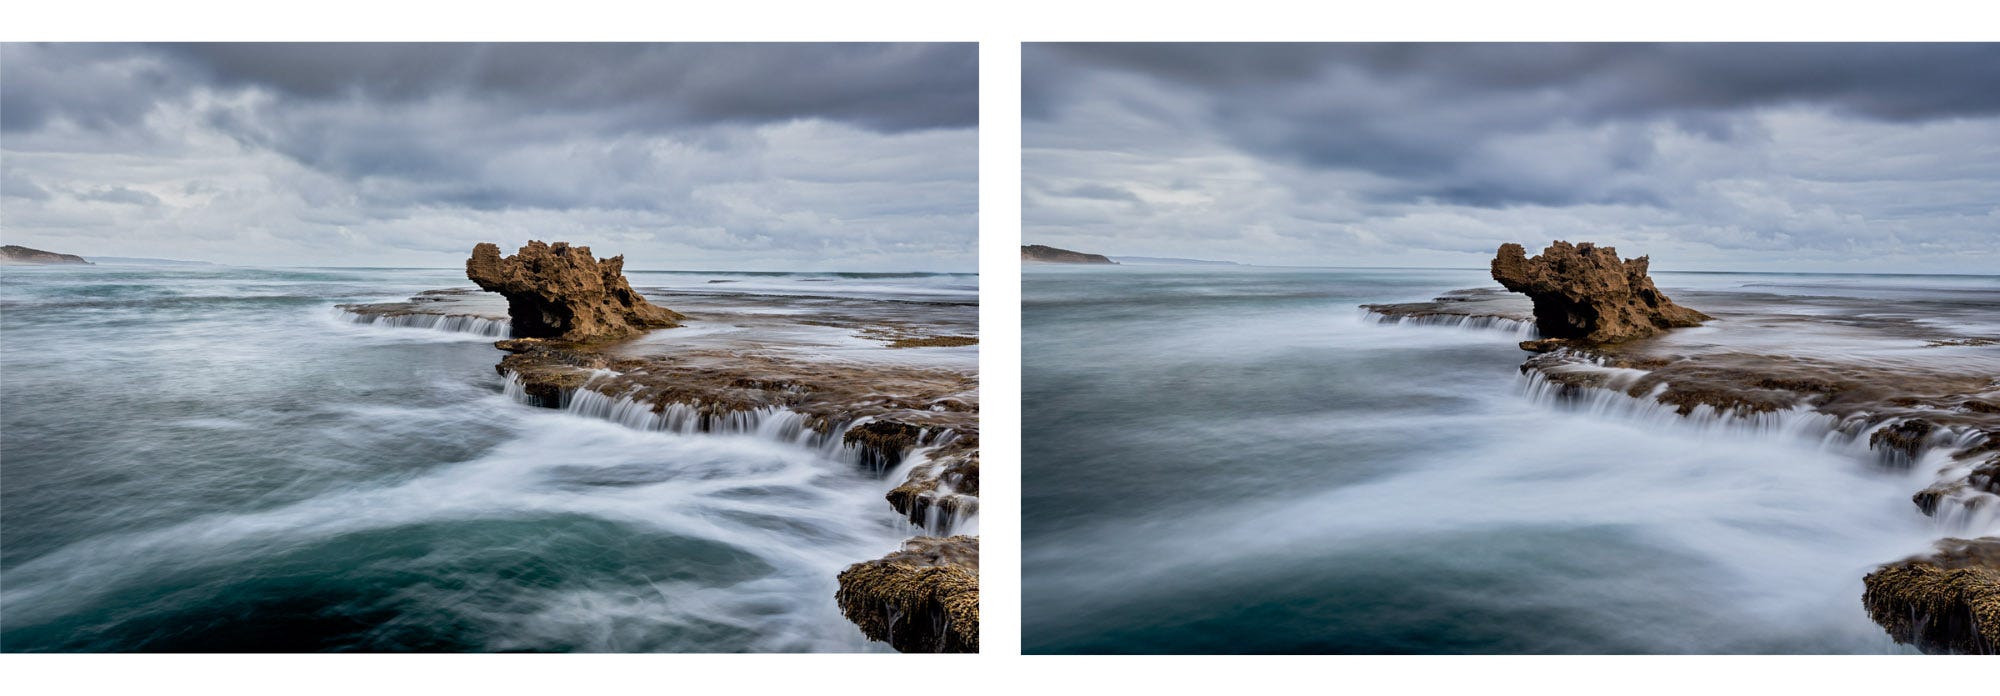
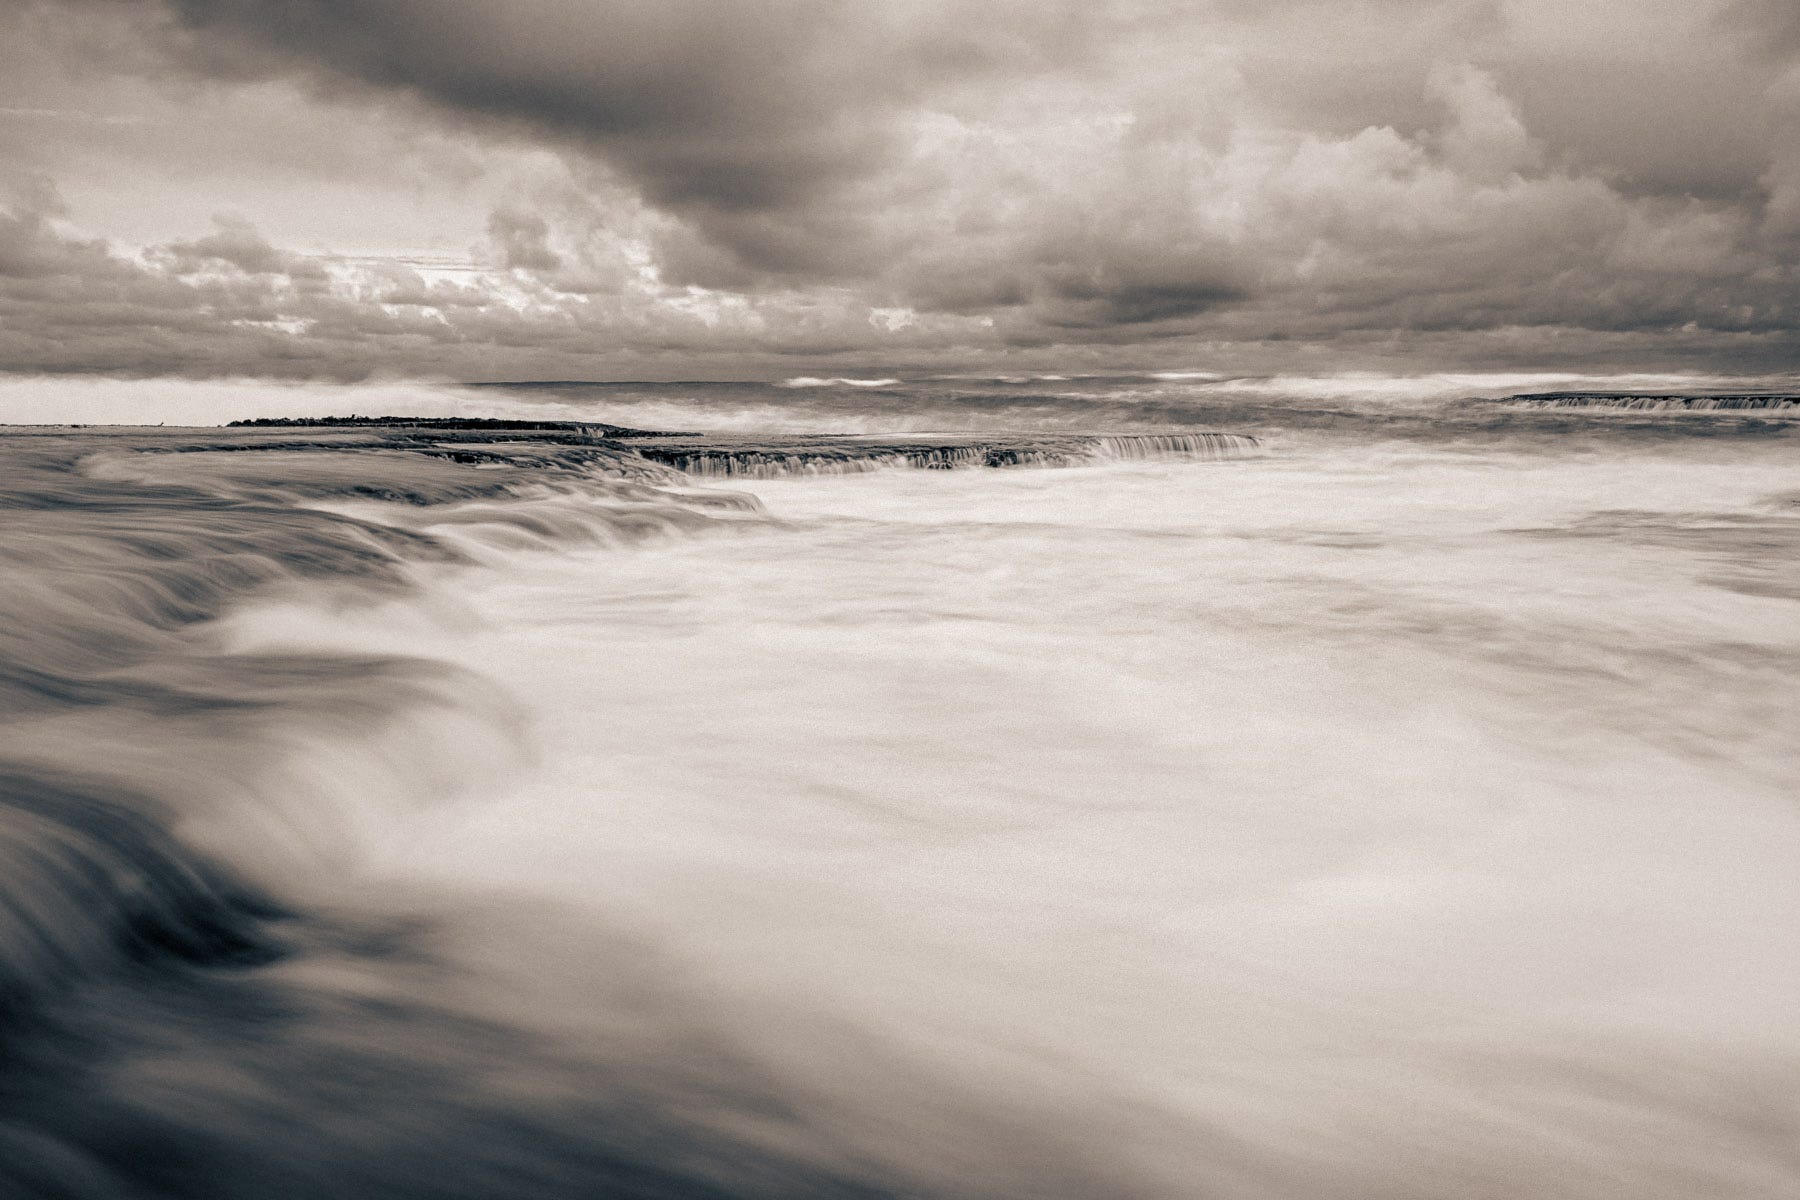
About 40 minutes later I came back to this composition having stacked 3 and 6 stop Neutral Density filters. The two images below are edited quite differently to the ones above. Here you can see the impact of shutter speeds of 50 sec and 45 sec respectively compared with 15 seconds, especially in the clouds.
The impact of the different amount of flow over the rock shelf makes a huge difference to the look and feel of the photo, even at roughly the same shutter speed. While I prefer the first image with the detail in the seaweed, I think the second image is interesting with only the rock feature being in sharp detail. The takeaway is that, when it comes to flow, always take multiple images at the same settings – you never know which version you will prefer.
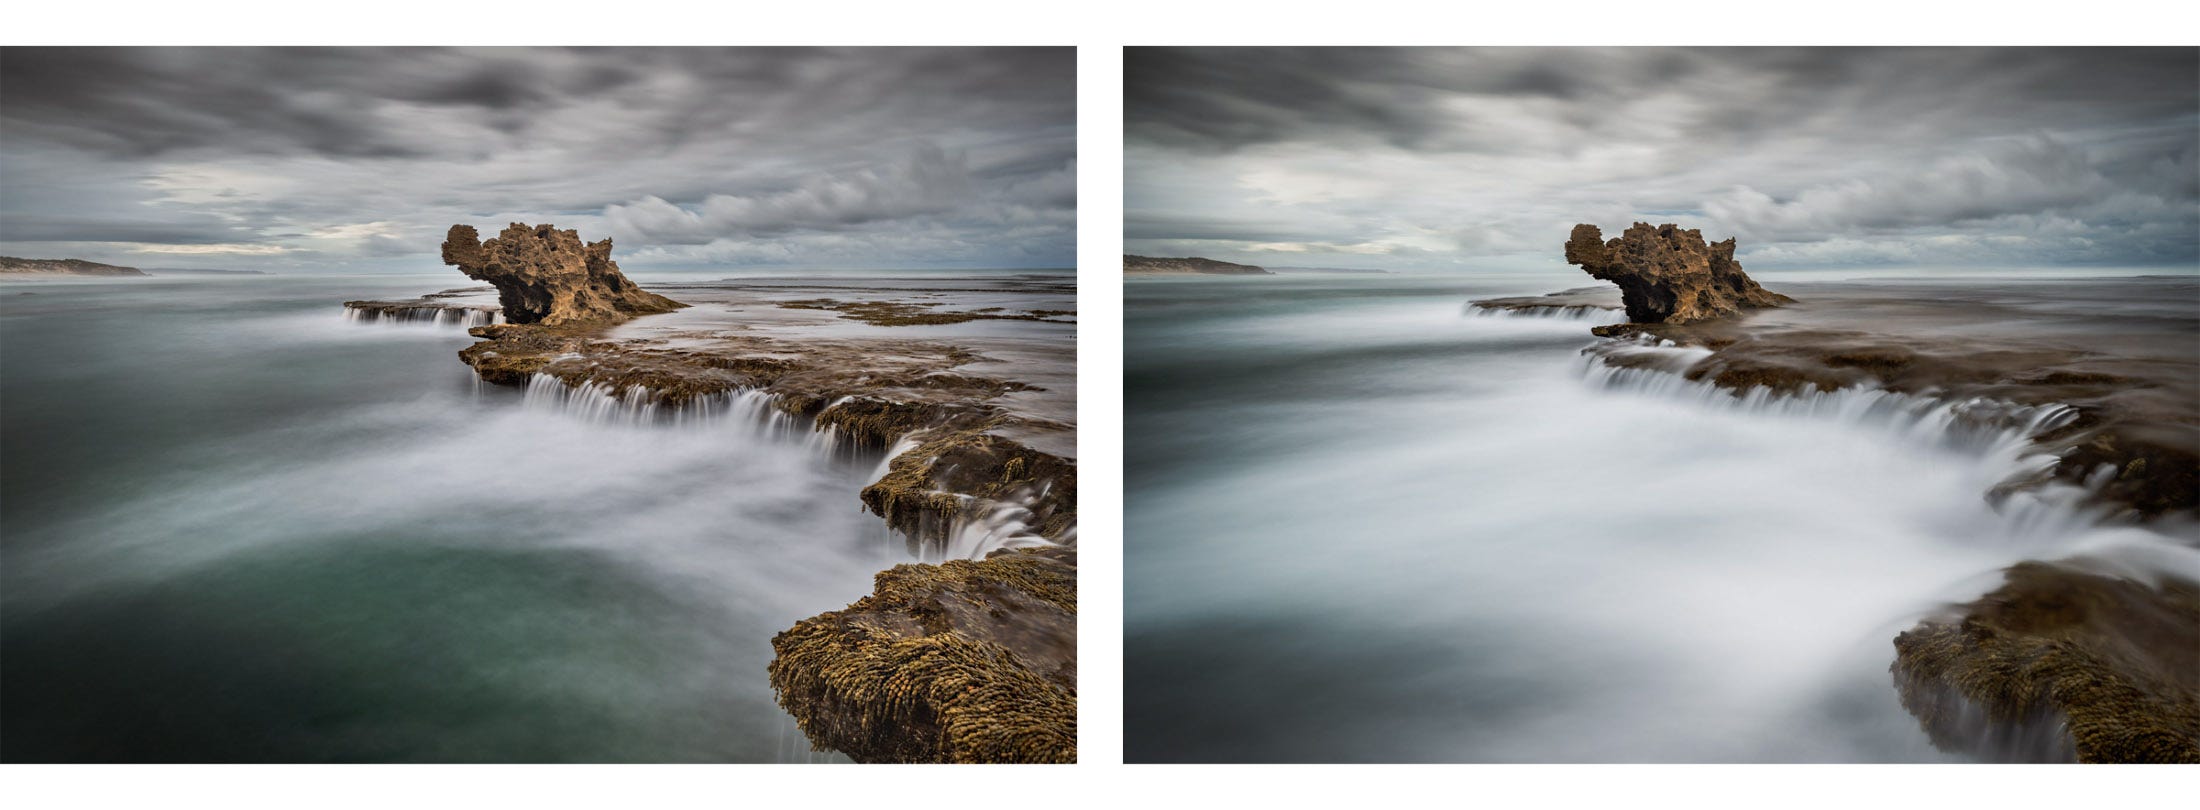
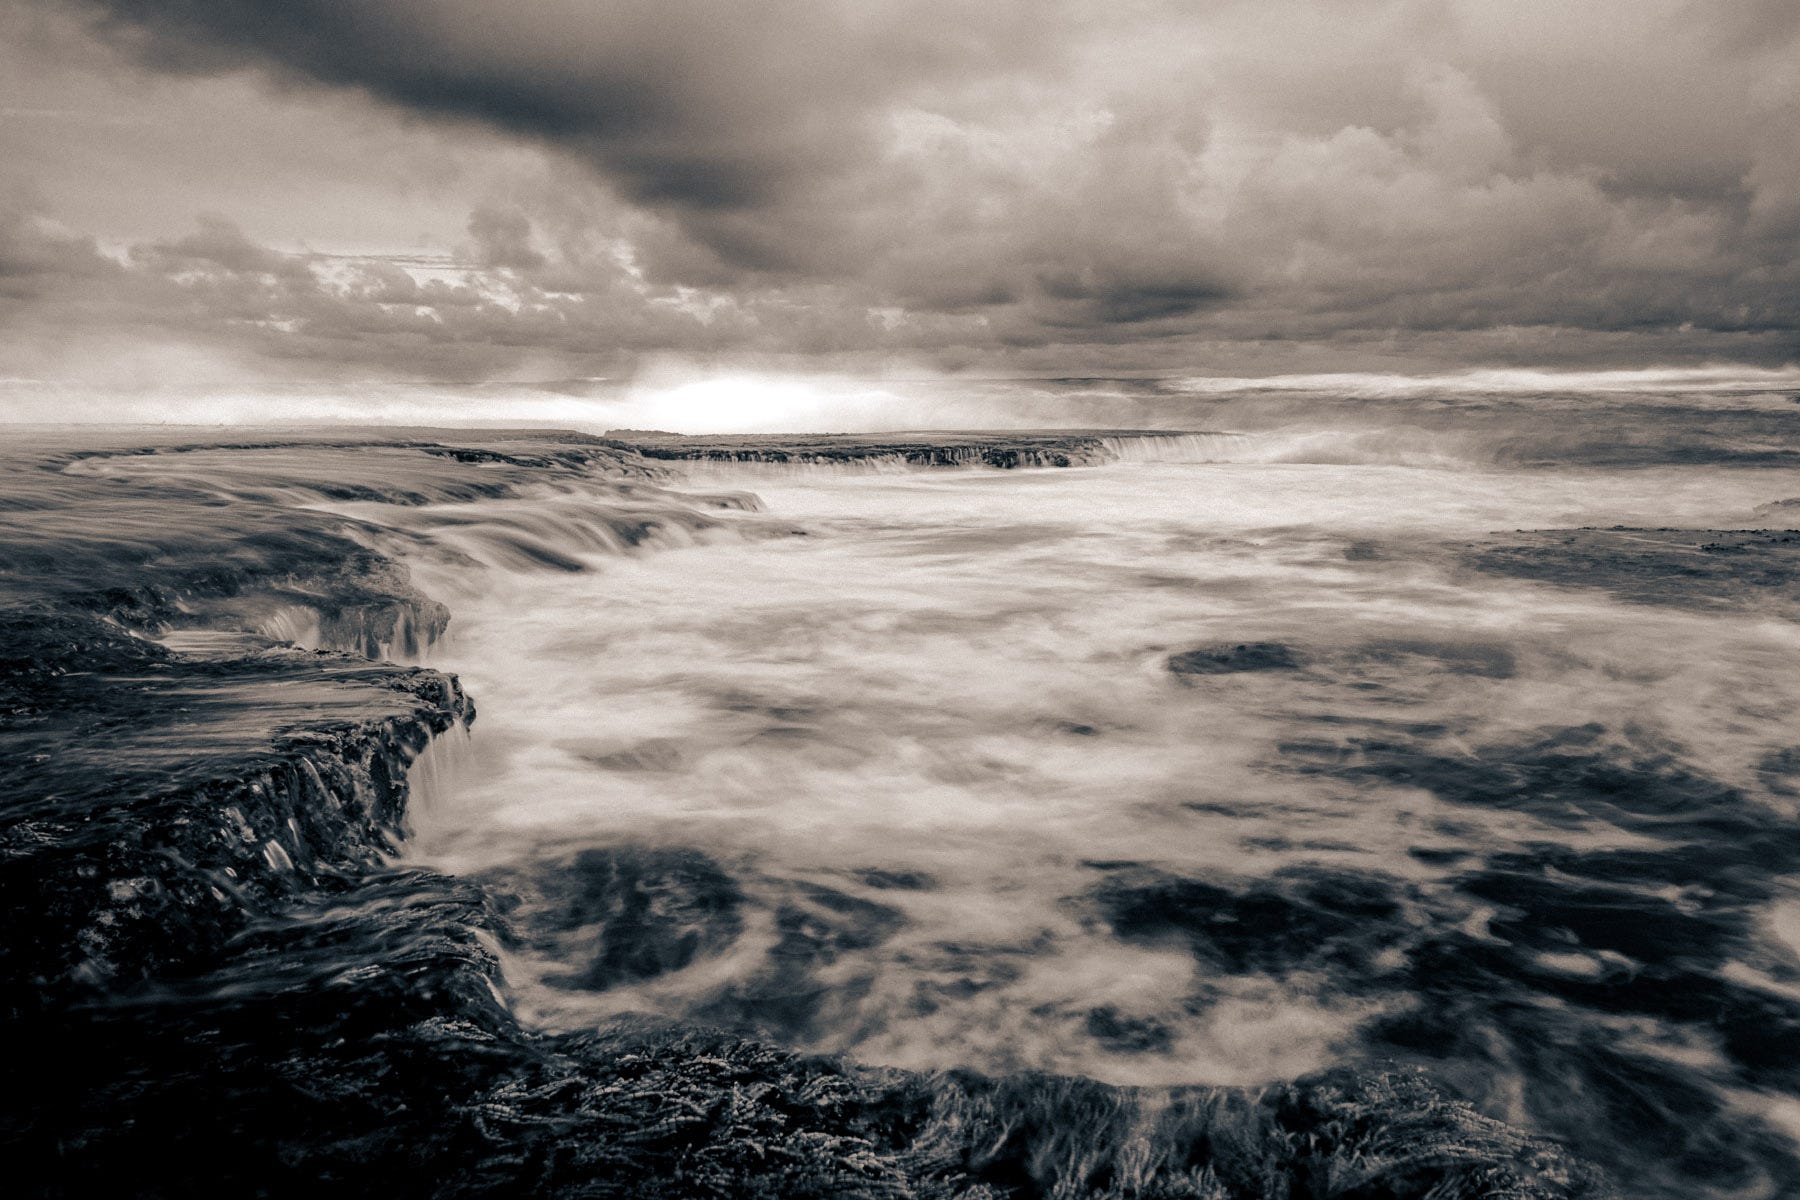
I have converted the next series to black and white and added some grain. All are edited the same way, with minor changes to compensate for different exposures. These were taken at 0.4, 5, 77 and 120 seconds. The first image has slightly different composition as I knew the interesting detail would be in the water. The remaining images have more focus on the rock formation encroaching in on the sky.
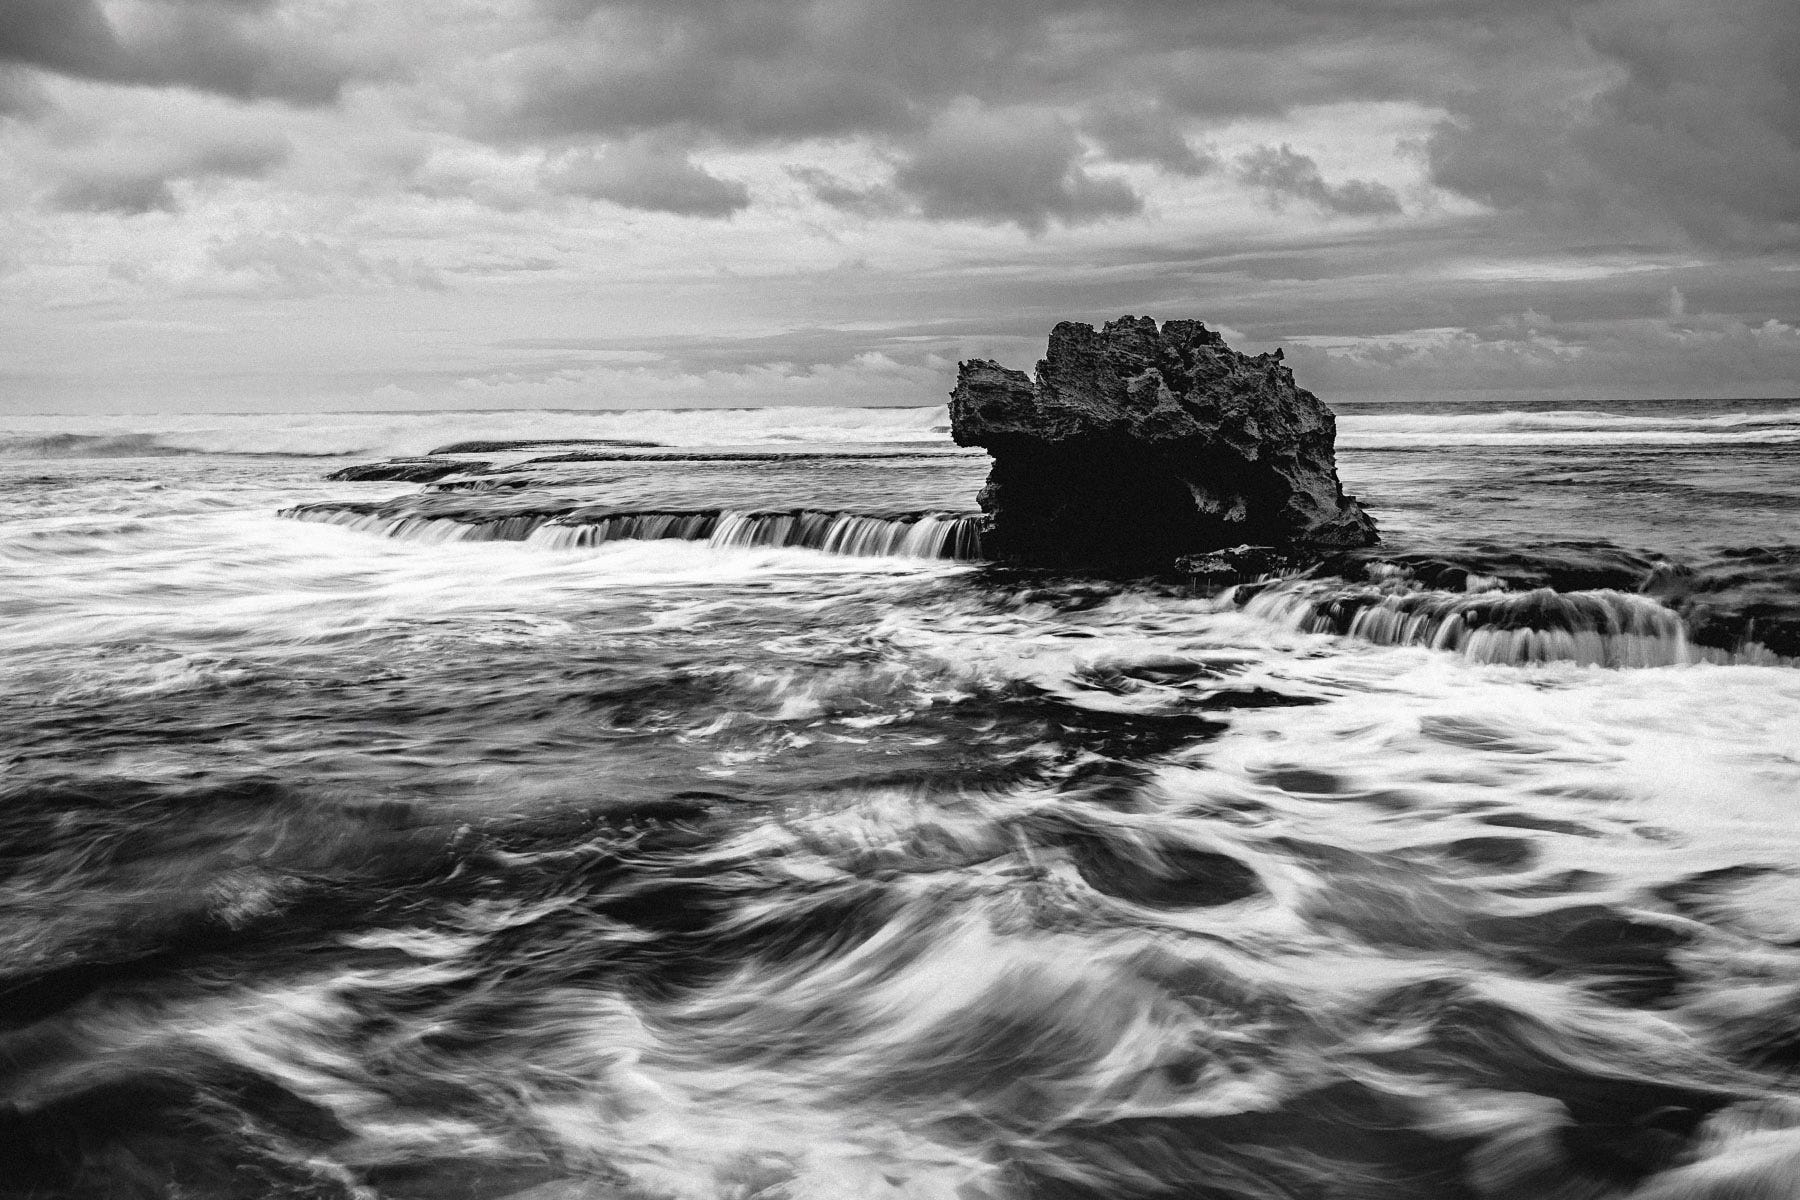

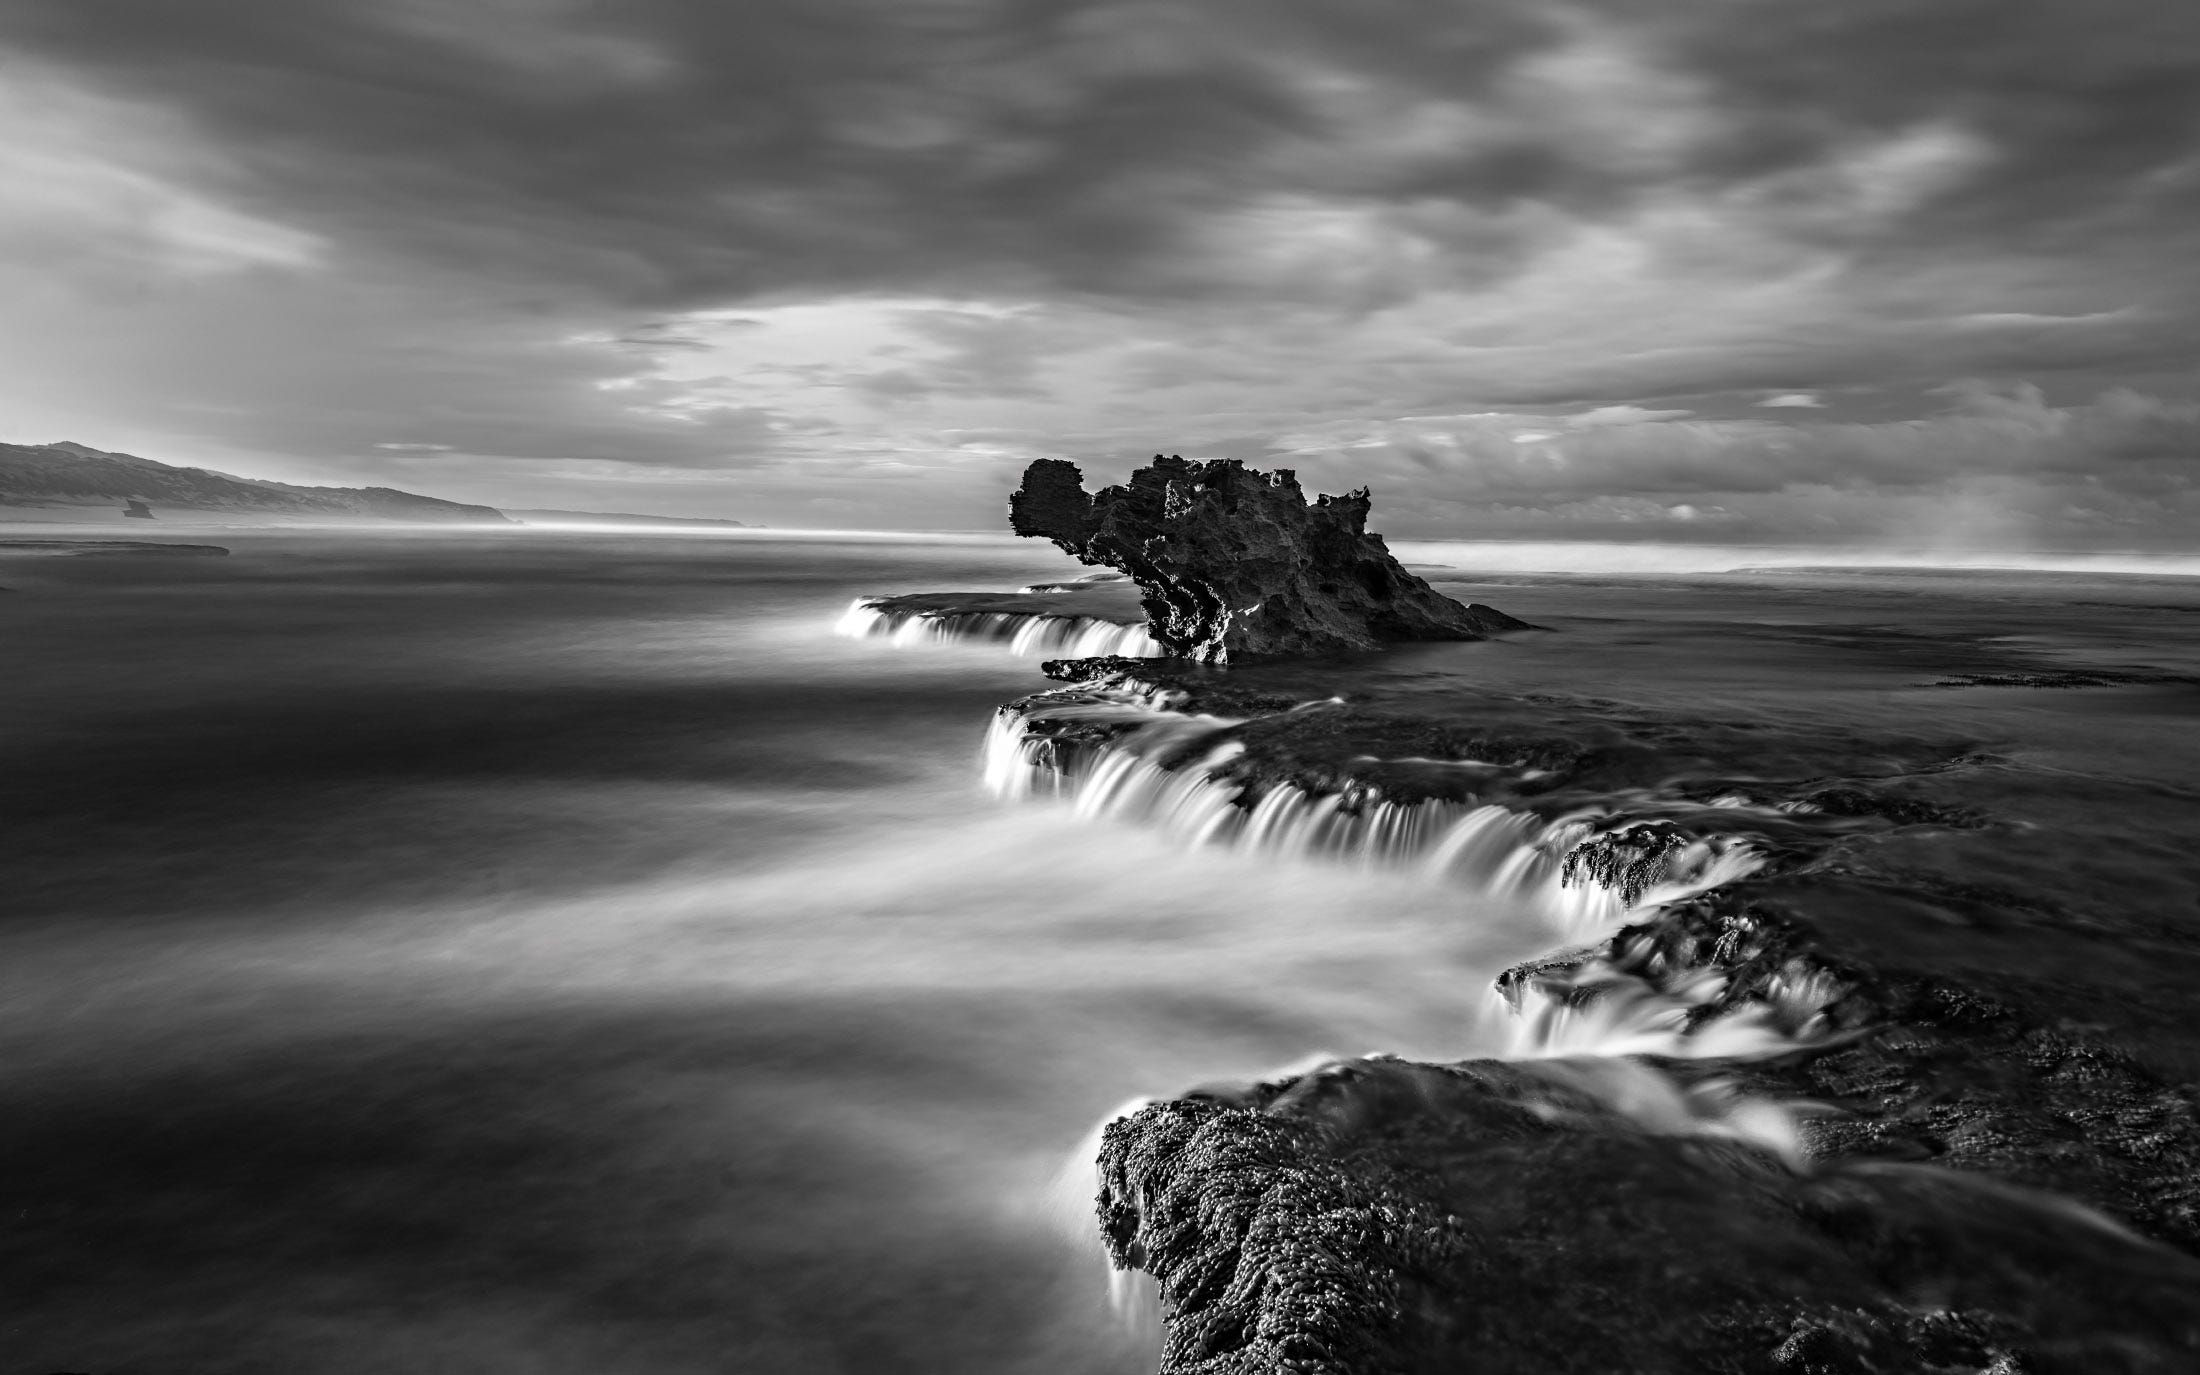
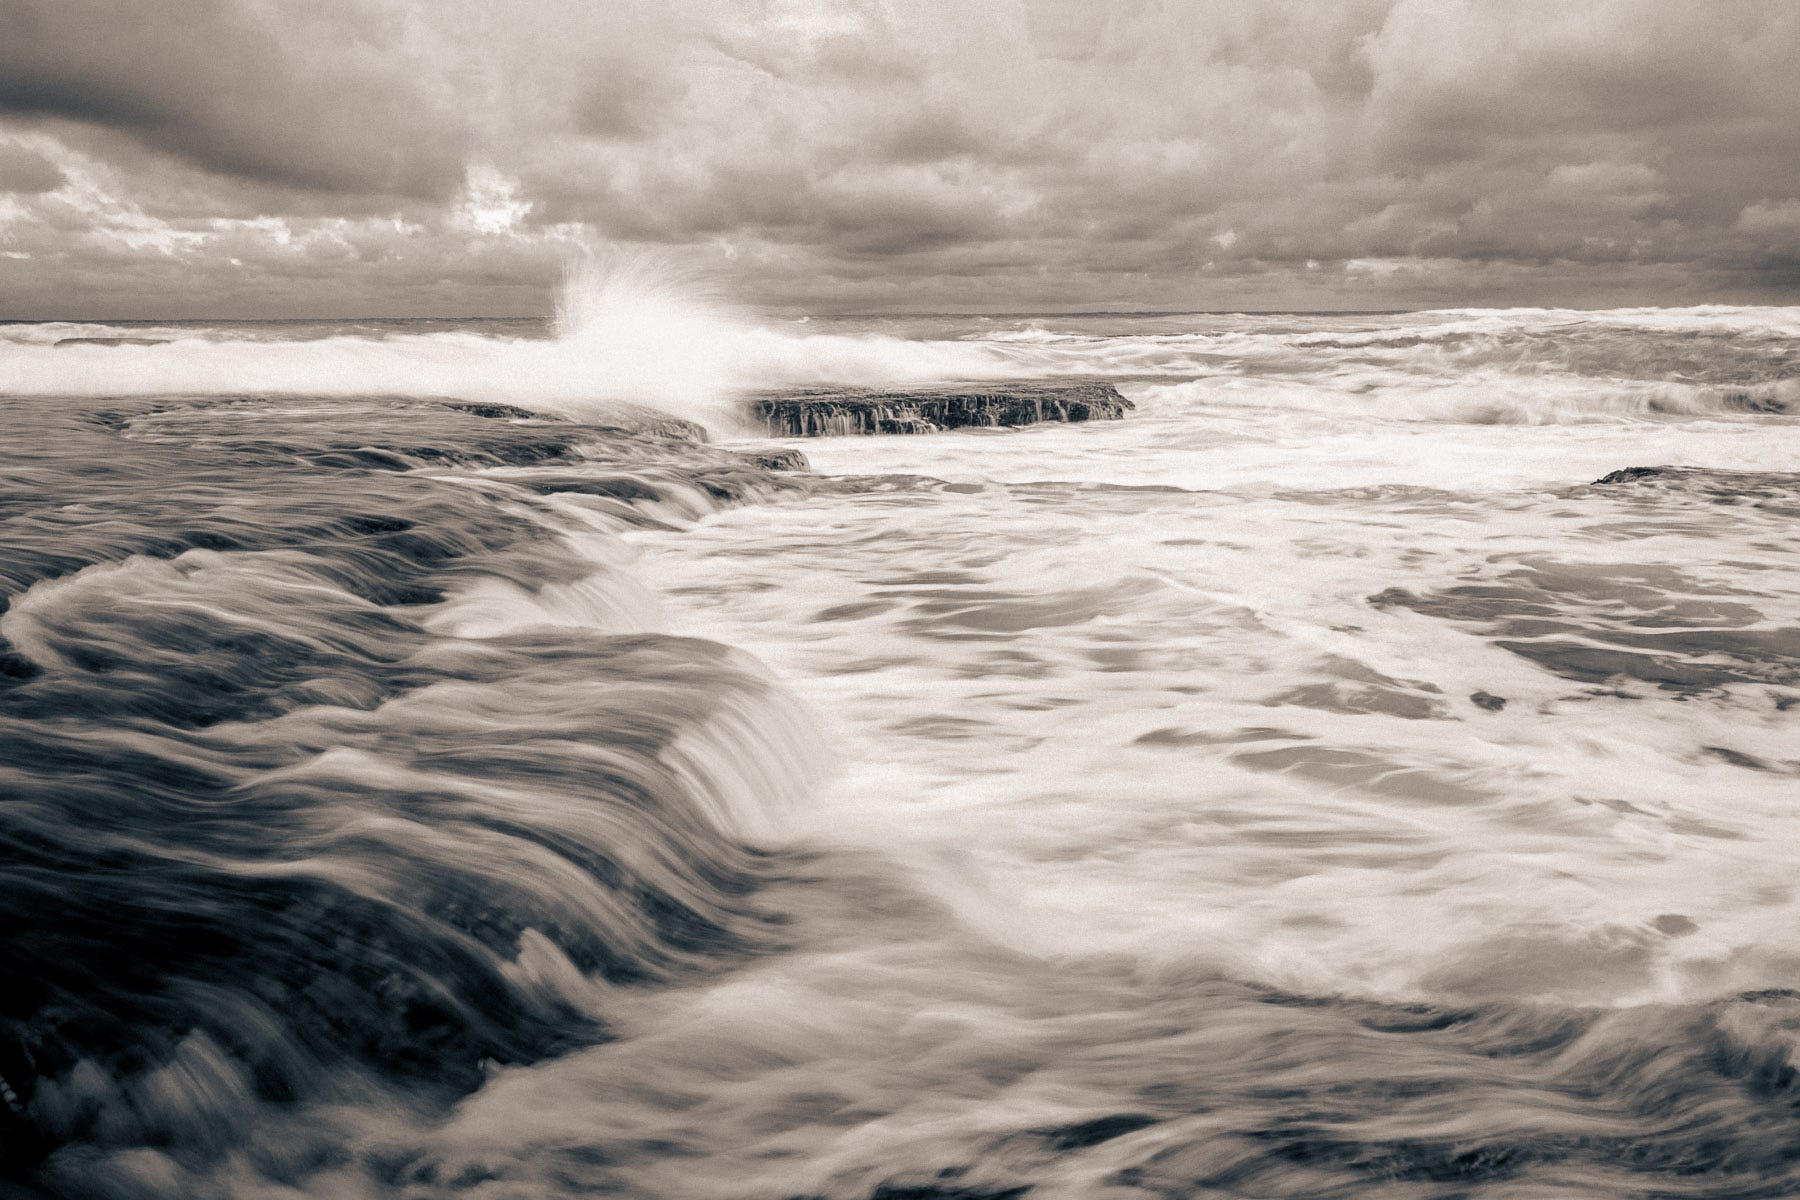
The next image is my favourite – I haven’t seen an image like it at this location. I had moved further around to get a different composition and had just taken a photo at 120 seconds when suddenly the sun found a gap in the clouds and provided direct light on the flowing water. For an agonising long time, I had to wait while the camera processed the long exposure shot, knowing the gap in the clouds was very small. Finally, I was able to reduce the exposure to 30 seconds and I took this image. I got one more 30 second exposure before the sun disappeared – it was out for about 4 minutes.
Split Toning
I have been doing a lot more black and white image making of late – partly inspired by the subjects and light I have been photographing, but also as I am exploring tone. Even for images I know will be edited in colour, I have set my EVF to black and white so that my preview shows clearly the tonal range in the image. This is a great learning tool even for colour photographers.
I also attended a B&W Digital Image Workshop with Les Walkling (info can be found here). Les is a passionate font of artistic and technical knowledge, much inspired by photographers of the past and also at the cutting edge of colour management and print making. This workshop has very much inspired me to explore different approaches to B&W conversion and the use of split toning.
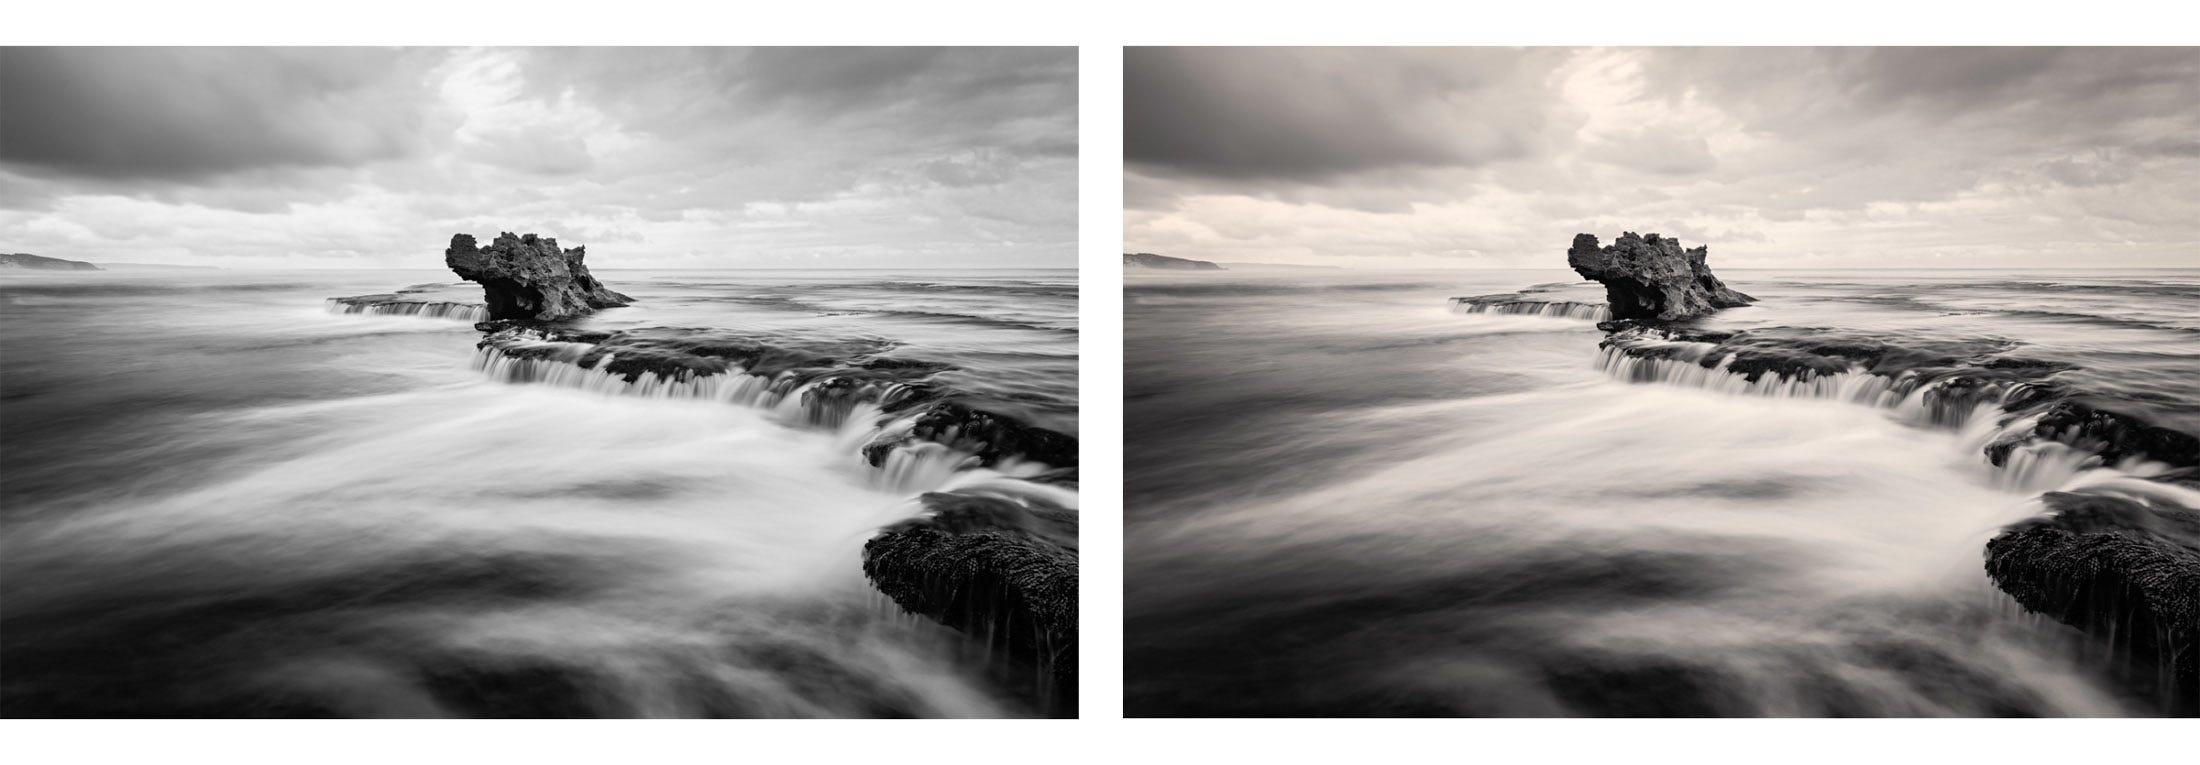
The images below are almost the same composition as the first set of images, converted to B&W using channels in photoshop. A split tone was applied to the second image using a gradient map. I think the toning brings a new dimension to the image. What do you think?
I then moved perhaps 15 metres and faced directly out to sea. While the images above have a lot of movement in the sea and sky, there is a serenity in the longer exposures, the action blurred except for the line of water flowing over the edge. The sea feels more benign. I wanted these last images to feel more threatening, with a greater sense of chaos and forces – you could get swept off your feet in these images.
I spent a long time finding a composition of rock, flow and clouds for the image below. The camera was low down and close to the rock so that, at 16mm, the rock provides a solid anchor for the image around which the water flows (1.6 second exposure).
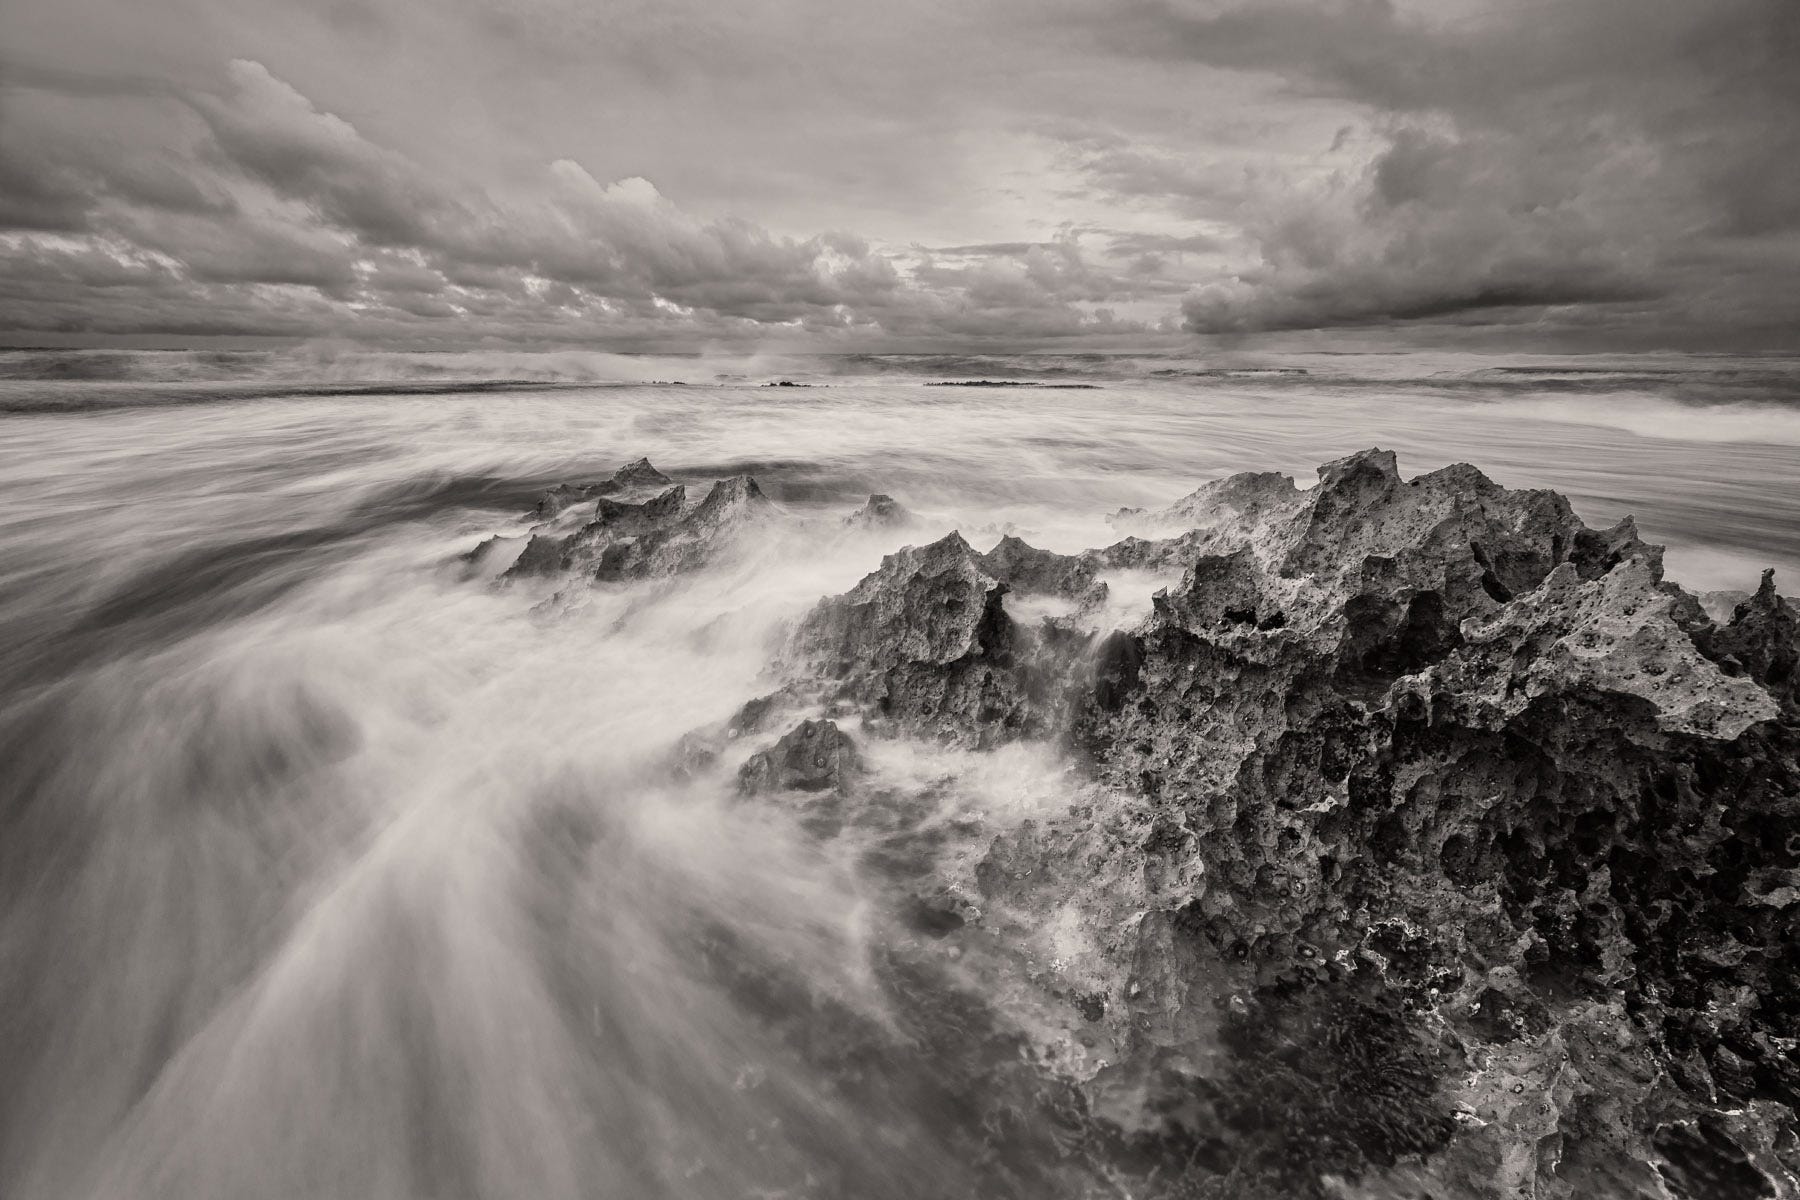
I wanted to go further and make the chaos of the sea even stronger, both in composition and processing. For my final set below, I used basically the same composition and went much heavier on the processing.
I hope you enjoyed these images and they gave you some ideas about using shutter speed and split toning. The only way to really understand these effects is to try different shutter speeds and approaches to processing on a subject that you have plenty of time to explore. Go out and experiment.
Such brilliant long exposures! Loved sitting with each one & marvelling at the tones. Like you, I changed my ev to monochrome & really has created such a lovely body of work that I am proud of. Thank you so much for sharing your process.
A wonderful and insightful read. 👍